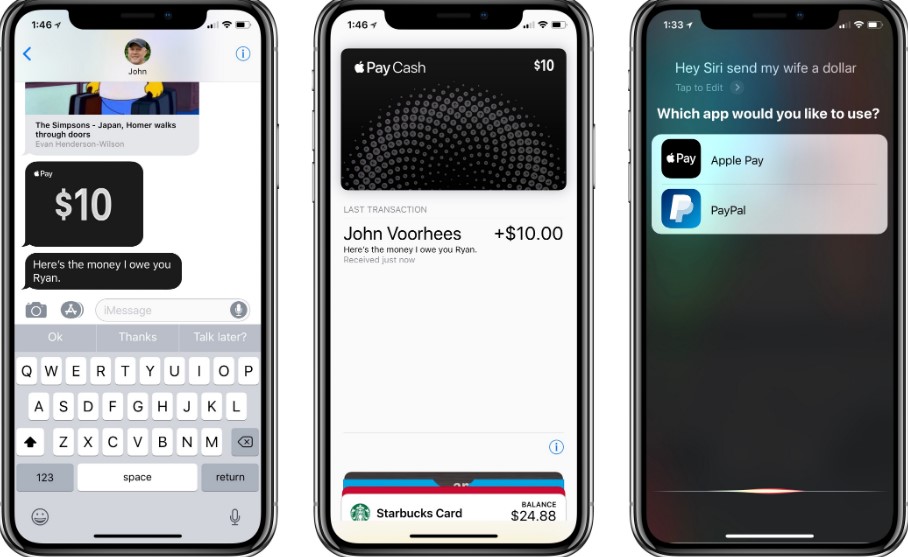
Apple Pay Cash is one of the latest methods of cash transfer and payment that has been launched by Apple and to make their service premium transactions can be done from Apple Pay Cash through iMessages.
It is one of the easiest methods of online transfer that has ever existed and you can pay and transfer cash with just a message.
The technology has been advancing ever since and this has also led to the advancement in cash transfer and payment methods. Initially, we only knew about PayPal, debit cards and credit cards but with the new smartphones, cash transfers can be made on your phone.
Apple Pay Cash is the best method of cash transfer and you can send and receive money to anyone with just a message.
What Is Apple Pay Cash?
Apple pays cash is the latest method to send and receive money online, anywhere, anytime. Apple pay cash was launched by Apple in 2017 at the WWDC. It was Apple's strategy to beat its competitors like PayPal and maintain market competition.
The Apple pay cash allows the customers to send and receive money with the help of iMessages. You can send and receive money from only the iOS users which makes this facility available exclusively for the Apple users. It is a very simple method and is just like sending a message in order to send cash to other users.
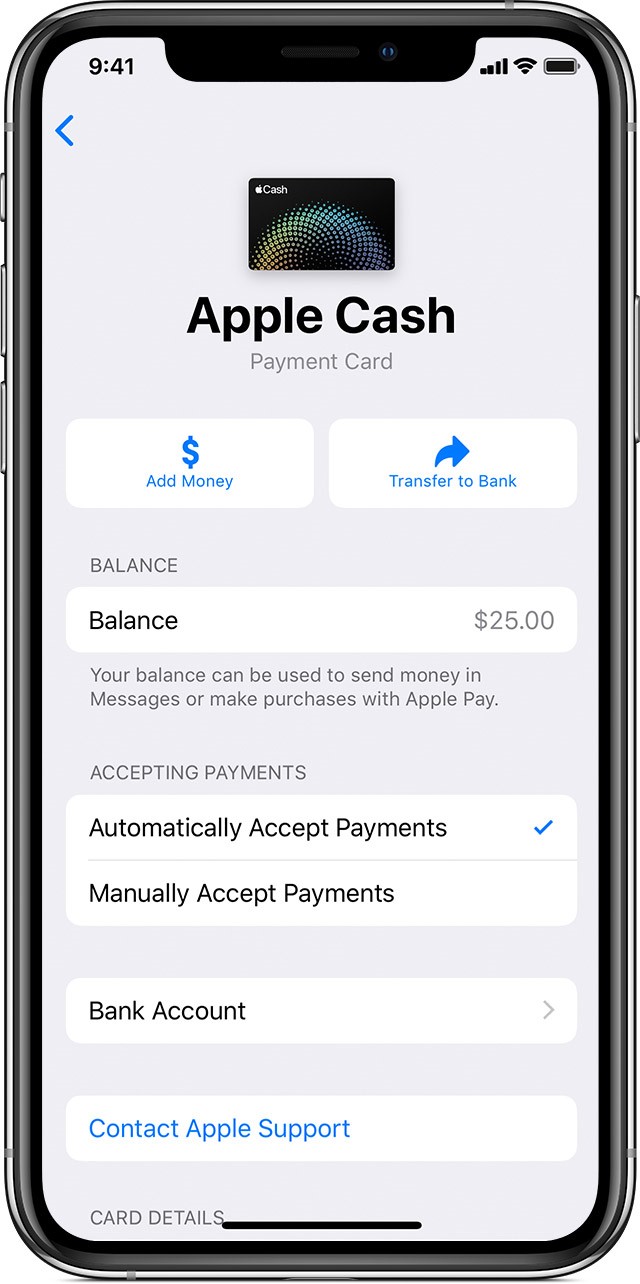
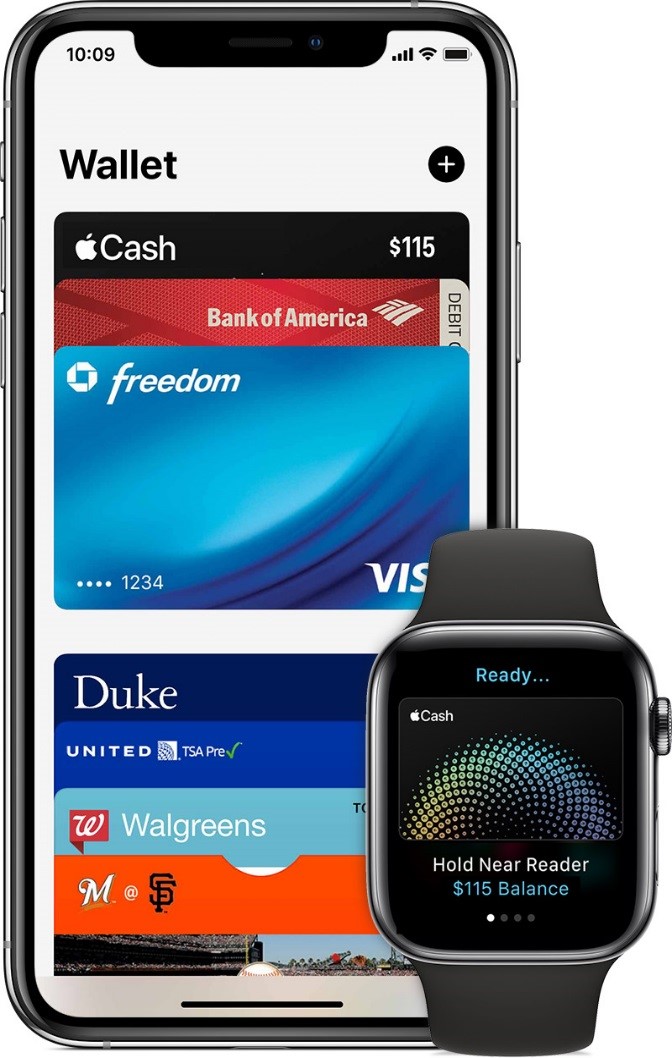
The money that is used in Apple pay cash is from your already existing Apple pay card. Once you receive the cash amount via iMessage, it is automatically added to your Apple Pay Cash Card account which is present there in your wallet application.
The Wallet app deals with all the transactions that are taking place with your card and it does keep a record of all the money inflow and outflow.
Then from the wallet, it is your choice to pay for things you buy or you can simply transfer the amount to your bank account.
The only sad part is that Apple pays cash is only available in the United States and individuals who are willing to use it need to be of 18 years.
How To Set Up Apple Pay Cash?
In order to set up Apple pay cash, you will need a few things which include:
- You will need a compatible Apple device e.g. iPhone or an iPad with the iOS 11.2 or the later versions as Apple pay cash is not available on the previous versions.
- You will also need two-factor authentication for the Apple ID that you will be using. Don't forget to sign in the iCloud with the same Apple ID on the device that you will use Apple pay cash.
- You will also need an entitled debit card in the wallet on your device, you will need it in order to send cash.
Once the requirements have been fulfilled you will simply have to agree to the terms and conditions in order to start using the Apple pay cash.
You can also agree to the terms and conditions when you try to send the money for the first time. Once you have accepted the terms and conditions you can easily send and receive money.
When setting up the Apple pay cash for the first time you will also have to set it up in the Wallet. You can do it on the device for which you fulfilled the requirements that have been provided above. The steps to enable it are very easy and they include:
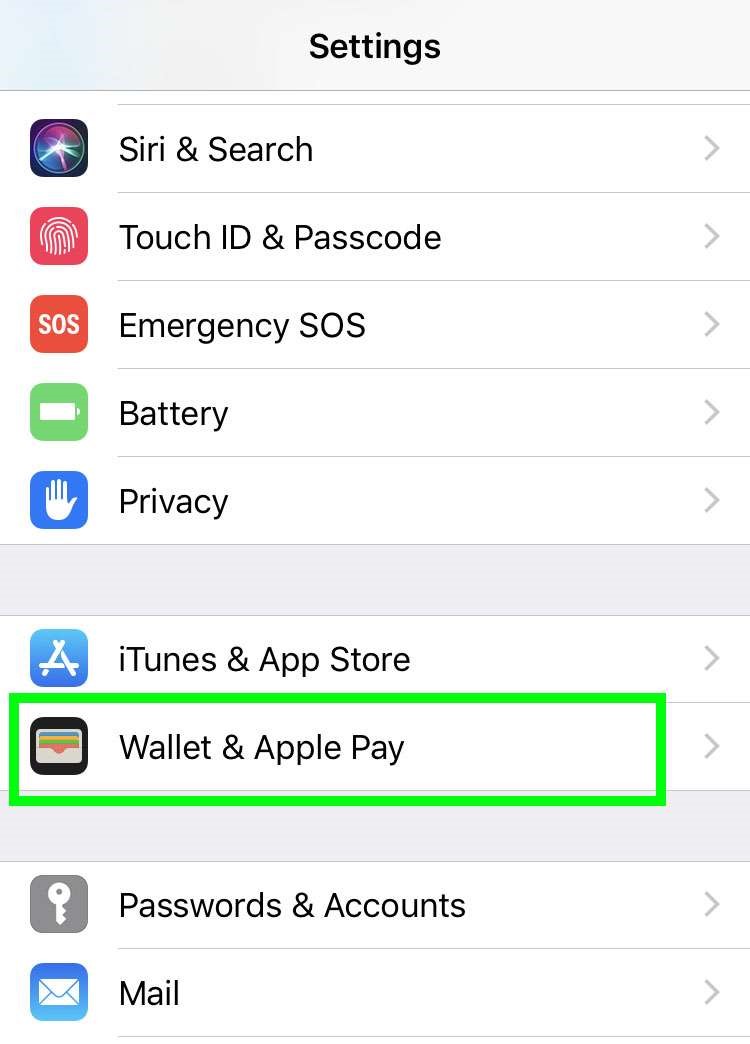
- Open the setting and then go to wallet and Apple pay.
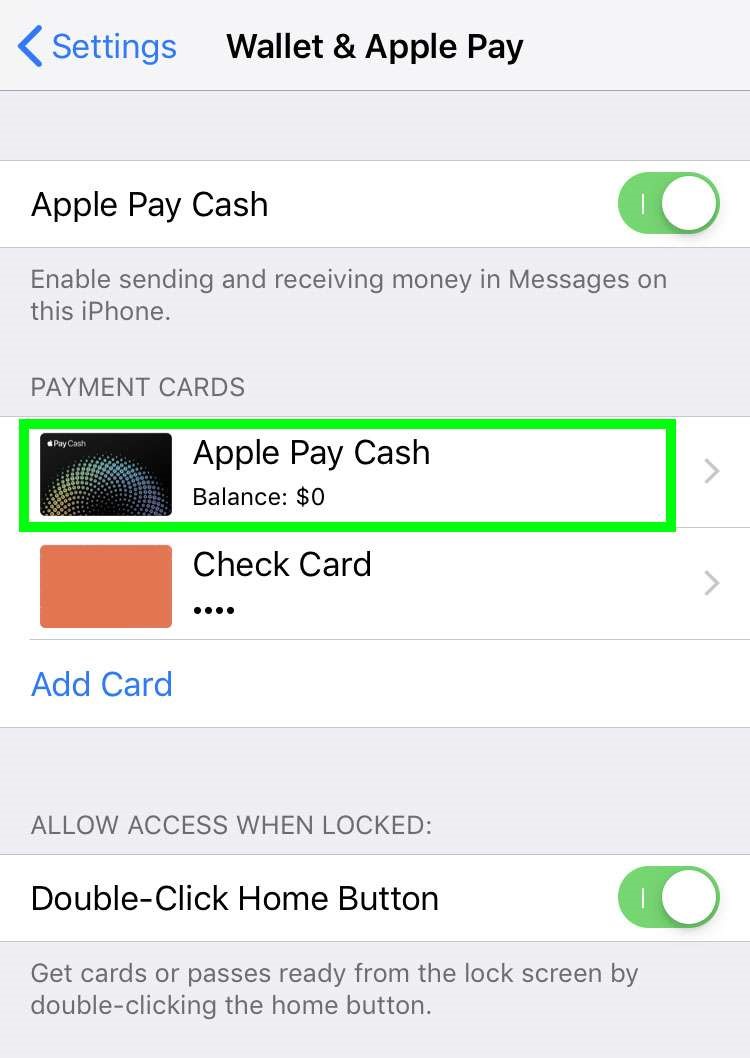
- Then select the Apple cash card and you will be given the instructions to follow in order to enable Apple to pay cash in your wallet.
The steps are that easy and you can then enjoy Apple pay cash to make your life easier by sending and receiving cash from your family and friends, anywhere, anytime. You can also use your Apple pay cash from any device once you have logged in using your Apple ID.
How To Verify Your Identity For Apple Pay?
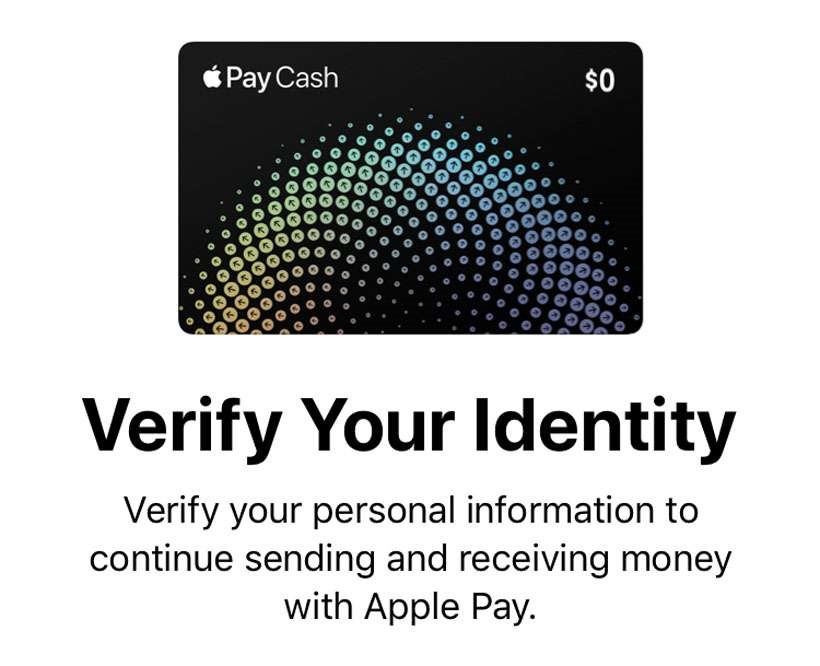
You will need you to verify your identity for Apple to pay cash in order to avoid any problems while sending and receiving money. There are simple steps and by following them you can easily verify your identity and that too on your phone. The steps are as follows:
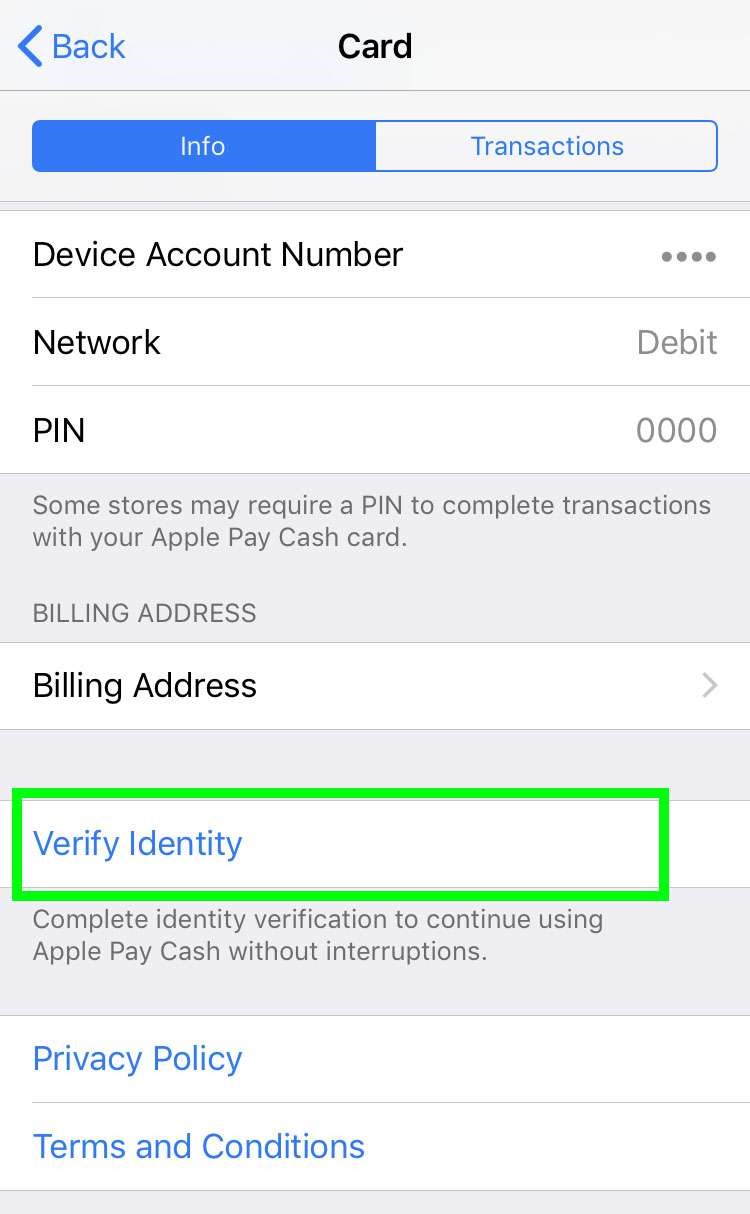
- The first step is to open settings and go to Wallet and Apple Pay
- Then select Apple pay cash
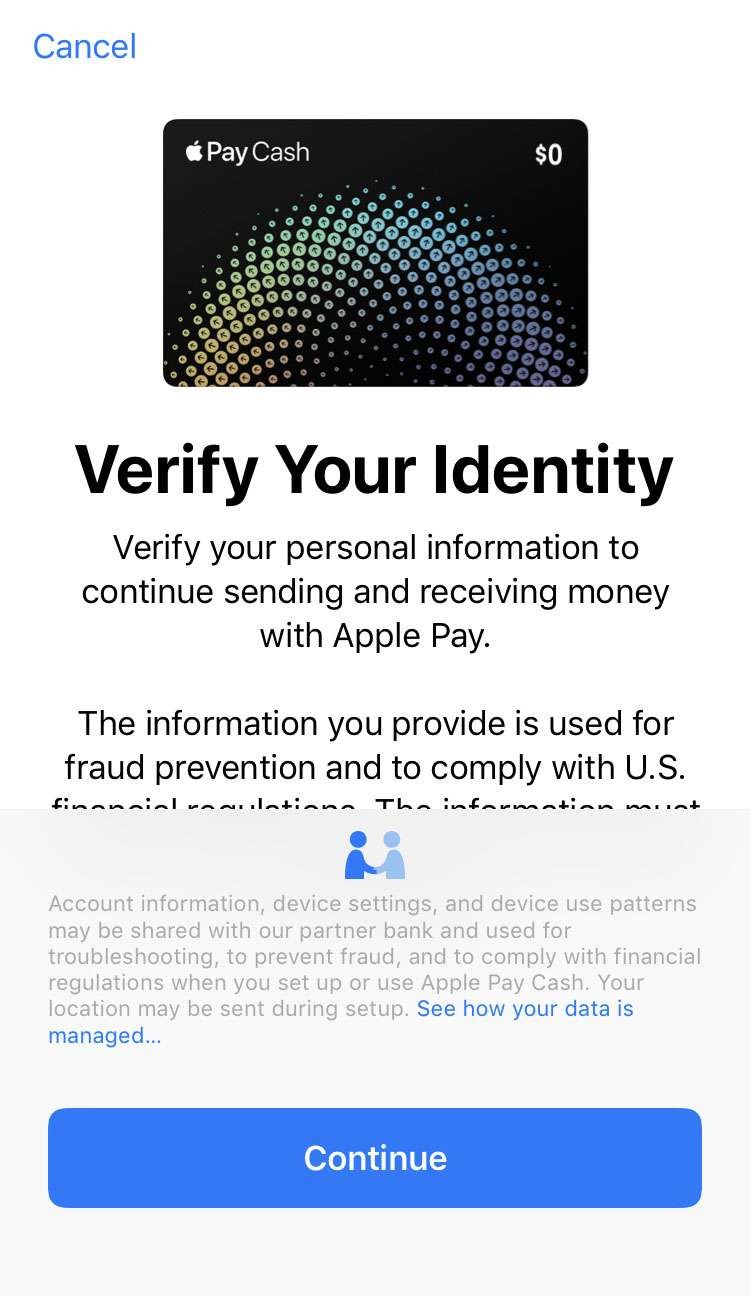
- Once you select Apple to pay cash you will be given the option to verify identity. Select it.
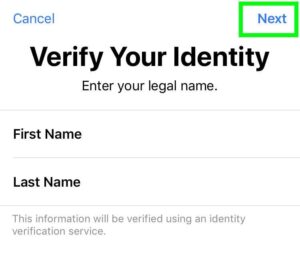
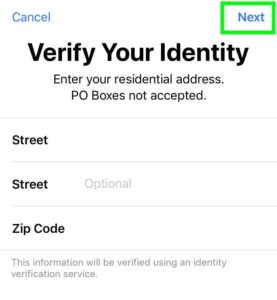
- After selecting verify identity, press tap to continue./li>
- Then continue to fill in the requirements like name, address, and date of birth and you are done with verifying your identity.

 How To Add Money To Apple Pay Cash?
It is a very easy process to add money to the Apple pay cash. You will have to add money to your existing debt or the prepaid card in your wallet. In order to use Apple pay cash, it is a necessity to have a debit or a prepaid card ion your wallet. Once you have the card in your wallet you can follow these steps to add money.
- Go the card information by opening the wallet application on your phone. Then select your Apple card.
- Then click on the info tab and you will be given the option to add money. Select it.
- Then you will have to enter the amount that you want to add to your Apple pay cash. The minimum amount should be 10 dollars.
- Select Add. Then you will have to select on the existing debit or prepaid cards. You can also add a new card but you will then have to fill in the requirements.
- Once you have selected the card option you will have to confirm with the password, face ID, or the touch ID.
If you are successful in adding the amount you will be able to see it on the top right corner of your screen. You can also view your balance by opening the wallet application on your iPhone and selecting the Apple cash card.
How To Send Money Via iMessage With Apple Pay In iOS 11?
iOS 11 is a very successful update of Apple server with amazing features, along with Apple Music, Apple Pay Cash via iMessage drove the users crazy and they couldn’t resist from getting their hands on it.
Each one of them loved every bit of this new feature because before the users were only able to send and receive Apple Cash via many apps but none of them was as convenient as doing a transaction directly from iMessages.
If you want to enjoy this feature then here are a few steps you need to follow
- Your Apple Pay account should be activated if it does not then do it by
Selecting ‘ Wallet & Apple Pay’ from the settings
Now select ‘Add Credit or Debit Card’, this will load a page of instructions on your screen you need to follow them to set up your account.
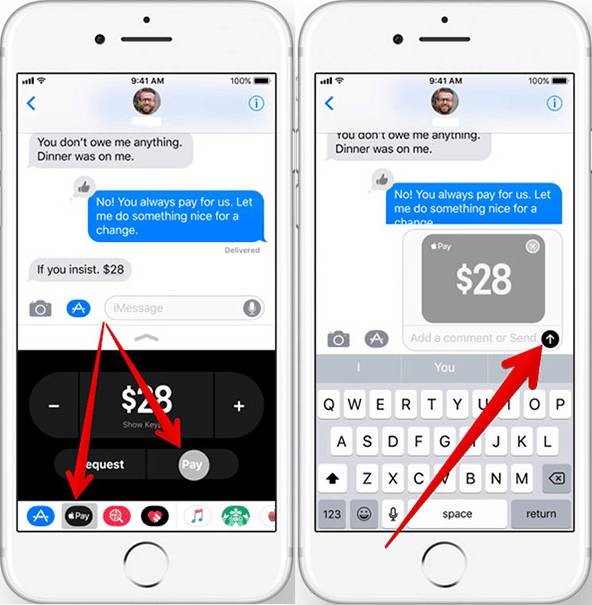
- Open the conversation from which you want to do the desired transaction
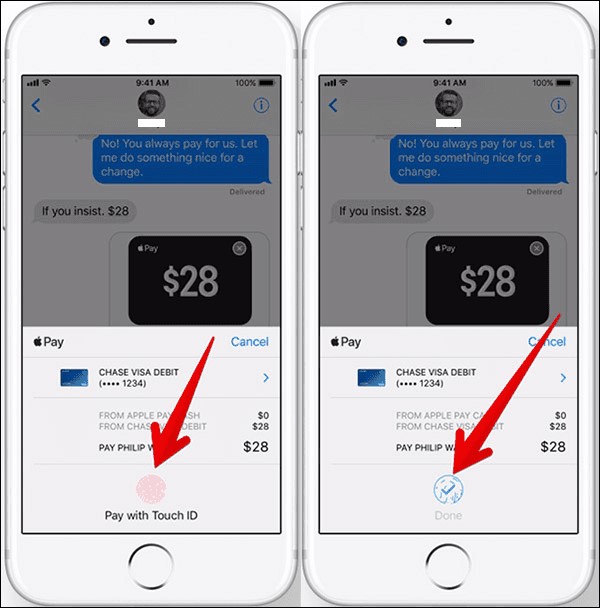
- A select drawer from the options and select ‘Apple Pay Button' and now enter the amount you are looking forward to sending. The next step to this will be an instruction page that you will have to follow to send the money.
This is what your screen will look like
- The last step to make this transaction take place is your Touch ID verification. This makes the transaction authentic since it proves that your Apple Device is not being misused and it is under your control. As soon as your Touch ID tick shows up your transaction is safe and is done successfully.>
How To Fix Apple Pay Is Not Working In iOS 11
Issues do occur in the Apple Pay cash account and have been reported by the user. Most of those complaints and problems have been given helpful solutions. Here are a few solutions to the potential problems that have been recorded
-
iPhone Region

-
Restart your device
Restarting is always a recommended solution to any problem you face in your apple device since it refreshes your system and does automatically fix the problem.
-
Update your device
There is a possibility that your recent iOS does not support the Apple Pay Cash feature and it needs an update in order to use it. Update your device by following these easy hassle-free steps Settings > General > Software Update.
-
Re-Add your Apple Pay Card
There is a possibility that your login session for the card might have expired and that is why you are not able to do the transaction. Re-adding the card will refresh the session and you will be able to proceed with your transaction without any problem.
Re-add the card by clicking on the ‘Remove Card' from the ‘Wallet & Apple Pay’ option. This will remove your card and now for re-adding the card click on ‘Add Credit or Debit Card’ and fill in your Apple Pay account details for sign-in.
-
iPhone X
The users of the iPhone X have repeated complaints about not being able to use Apple Pay and that is because the iPhone X is different from all other iPhones because it originally comes without the home button.
Just for the iPhone, you have to use your face ID as verification and authenticity of your transaction. Make sure Face ID is enabled on your iPhone.
These are the easy solutions to a few of the most reported problems which take place in the proper functioning of Apple Pay Cash.
How To Make Apple Pay Cash Payments With Siri?
Siri is a virtual assistant developed by Apple Inc just like iMessages and other built-in applications. It is an audio OS operating system that uses voice commands to perform a task.
There is a built-in translator that works hand in hand with Siri which changes the natural voice and makes it audible for the system to work on it.
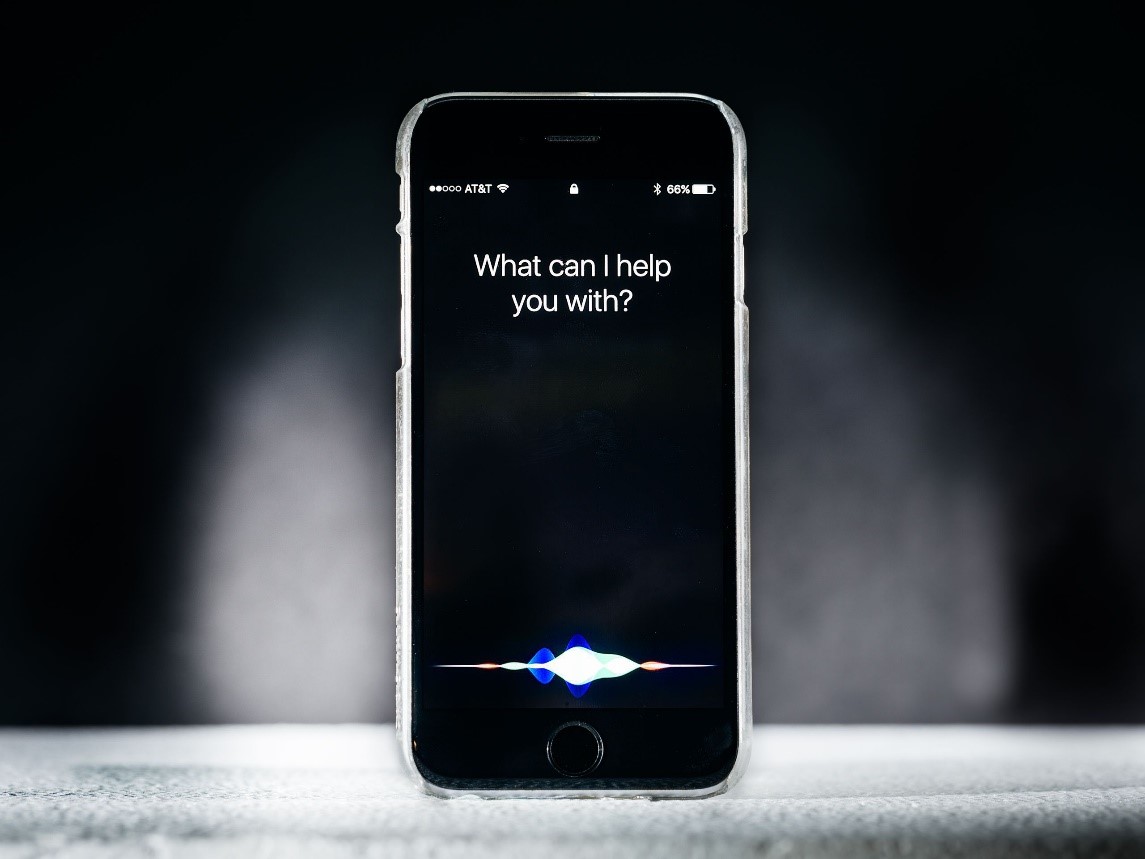
You can make an Apple Pay transaction through Siri by saying it out to it. You just need to speak the amount you want to send and to the person, you want to send, and send the command.
Siri will work on it and after everything is prepared by Siri a Touch ID verification page will load where you need to place your finger or thumb as the last step before the transfer takes place.
Moreover, you can speak the transaction details to Siri for later processing in case you think you will forget to make the transaction and it is important to you.
How To Send Apple Pay Cash Balance To A Bank Account?
Apple Pay cash account is different from your bank account. Money received from Apple Pay Cash is added to the wallet and there is an option for you to get it transferred to your bank account which will add in your previous balance.
Here is what you need to do for transferring the balance
- Go to your ‘Wallet’
- Select ‘Apple Cash Card’
- Select the blue icon which is at the lower right-hand side of your device's screen
- Select the ‘Transfer To Bank’ option which is the second option on the list.
- Enter your bank account by selecting ‘Add Bank Account’ if you have not already signed in it before. This will ask you for your account details to proceed further.
- Enter the amount you want to transfer and click on ‘Transfer’
- Verify your ownership of the account by Face ID (in case of iPhone X) or Touch ID
Your transfer has taken place successfully now!
How To Send Money With Apple Pay Cash – Conclusion
Apple Pay cash is a new technology and is very convenient to set up and use. You can set it up and easily, send and receive cash from your friends and family without wasting any time. It is the latest method of cash transfer and is also easier than other methods.
However, it can only be used in the United States which does not make it global as compared to other payment and cash transfer methods that are global and can be used in any country. Apple pays cash is also not very famous at the moment except for the United States.
It is better for individuals to use more global methods of payment. Apple pay cash might be the easiest and the famous method in the near future but it requires more time to gain popularity and to become available in other countries except for the United States.
Apple Pay Cash does not restrict our balance to our Iphone’s wallet, in fact, it does allow us to transfer our balance to our bank account which we can use just like our other money.
Apple Pay works from iMessage to iMessage also. We can send and receive from anyone from our iMessage list. Moreover, it does accept Siri's command and responds perfectly to it.
Apple Pay Cash is worth using features especially because of the balance transfer facility of Apple Pay Cash through iMessages.
You can also Read Trend Liff Other Guides Too!

