Many individuals are a fan of iMessage rather than the iPhone itself. Users do not switch to other phone brands just to use the iMessages. The imessages were first launched in 2001 when Apple introduced the iOS 5.
At that time, Apple itself might have known the value of the iMessages. Using iMessage is very simple and users can use it without any worries. Individuals can also send special stickers and GIFs on their messages, unlike the regular messages. Voice notes and videos can also be sent without any hassle or extra charges.
The most important difference between an Android and iPhone is that iMessages can’t be used on the Android phone. This can be made possible if you have the heart to take a risk and experiment with the software.
People have always wanted that Apple launches an iMessage application for Android smartphones. However, Apple has never done so as it might be a threat to their sales. Many people have tried to develop iMessage for Android phones but they have failed.
However, hackers have found some ways in which, iMessage can be used on Android phones but these methods are not legal. The most secure method to use iMessage on Android is through AirMessage but that requires a Macbook.
So individuals have to be connected to Apple in some way in order to use iMessage on an Android phone. The methods will be explained later in the article.
Features Of iMessage On Android
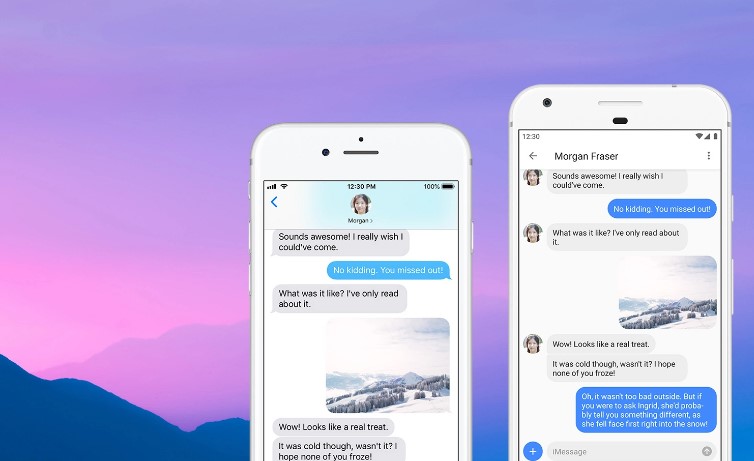
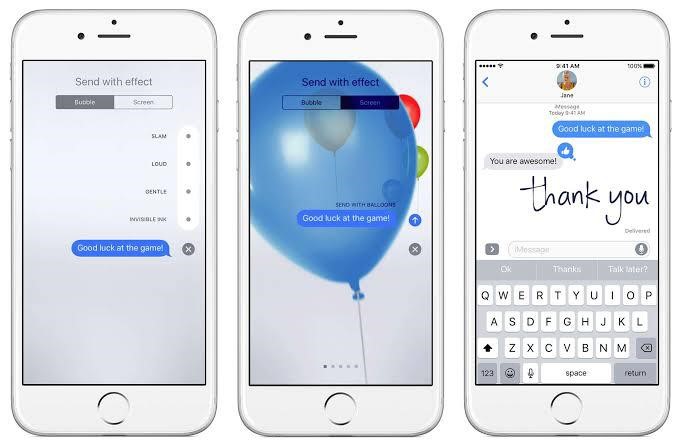 Almost all the features that one can use of iMessage on an iPhone can be used on an Android phone as well if it is successfully set up. The features of iMessage include sending messages that appear to be in a blue bubble.
You can also send you pictures in just a click. Pictures can be sent very easily. Different fonts are available to send iMessages. Even on the android phone, you can use select from the font options available.
You can also send messages in your own handwriting. A box appears on the screen and you can write with your fingers to send messages. This option is also available when using iMessages on an Android phone.
Stickers can also be sent while chatting, however, some problems may occur while sending GIFs. There is a huge variety of stickers available that are specially designed for imessages and are not available anywhere else. All those stickers can be used.
However, there are differences in the screen effects when using iMessages on Android. You cannot use the 3D touch to send the messages without tapping on the send button.
The bubble effect may also be interrupted on Android phones. Apple allows users to send messages in a bubble effect. This also requires the 3D touch and most of the android phones. So you may be deprived of some of the features when using iMessage on an Android phone.
Why You Can’t Normally Use iMessage On Android?
Apple does not allow users to use iMessage on any other phones except for Apple. This is done in order to protect the sales of Apple. Apple has made the highest sales from its hardware that includes the iPhones.
Apple believes that many users buy their iPhones because they can’t live without the iMessages. Introducing iMessage for Android users might lead to a fall in sales of the iPhones. As users might want to use phones from other brands with iMessages in it.
Another reason why iMessages can’t be normally used on Android is that Apple uses a special kind of technology. Apple uses a special kind of end-to-end encryption system.
This system secures the messages from the device they are sent on and the device that is receiving the messages. This is protected with the help of Apple servers. As the iMessages sent are encrypted, they can only be decrypted with the device that knows how to do so. The messages can only be decrypted with the Apple devices.
Since the time iMessages were introduced, Apple has kept iMessages as a way of attracting people towards its products. They have also been boosting their sales with their help. iMessage has also become a kind of megatrend. In today’s world, many individuals would use the word ’iMessage’ instead of ‘message’. For example, iMessage me instead of message me.
Can You Get iMessage For Android?

Apple does not provide any application of iMessages for android. iMessages is also not available for any android phone. This is also one of the major differences between Android and iPhone that Android users can’t use iMessages.
However, with the advanced technology and the use of right techniques and tricks, it is now possible to use iMessages on your Android.
There is no legal and official method to use iMessage on android but due to the advancement in technology, technology freaks have found ways. There are some applications that can help you to get iMessages on android. The methods are lengthy but you can get iMessage on the android device.
How To Get iMessage On Android


Here are some methods with which you can get imessages on your android. Here are 3 methods and these are the most popular to get iMessages on an android device.
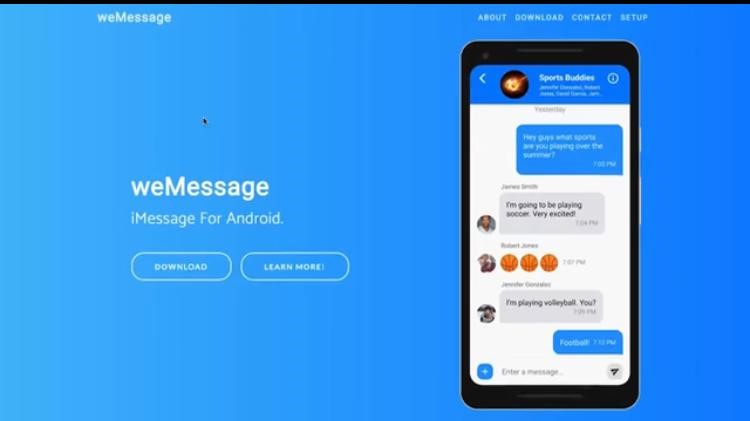
Method 1: Set Up weMessage For iMessage On Android
WeMessage is a way around Apple’s control over iMessage. With the help of WeMessage individuals can use iMessage on their android phones.
The process is a bit lengthy but it is worth it. There are simple steps that can be followed in order to set up weMessage for iMessage on Android. There are some steps and requirements that need to be fulfilled in order to start using iMessage.
The requirements are as follows:
- You will need an Apple ID, it is also your iMessage account. You can use your old iMessage account or simply make a new one.
- You will also require a program on your Macbook that is Mac running macOS 10.10.
- The third requirement is a Java 7 on your Mac
- You will also need an Android phone that has a running software Android OS 5.0 (lollipop) or higher.
- You will have to install the Wemessage application on your Android phone.
Once the requirements are fulfilled you can understand how weMessage allows you to use iMessage on your Android phone. iMessage might not work on Android but it works on IOS and MacOS.
In this process, it is the Mac that is the most important. WeMessage is basically a program that allows users to access their iMessages on android phone via Mac that routes the messages with the help of the iMessage network.
This means that the messaged are routed through a different channel but at the end, they pass from Mac in order to encrypt the messages. The encryption of the messages is still secured by Apple.
To set up iMessages through WeMessages requires some steps to be followed. There are many steps that need to be followed and it requires some work and patience. However, it is a great method for those who are determined to use iMessage on their android phone. The steps are as follows:
- First of all, you need Java to be installed on your Macbook. Then you will have to check if it is navigating or not. To check click Applications and then utilities. Then you have to install the pre-installed Terminal app on the Macbook. Then type Java and return back.
- While launching the app if no kind of error appears it indicates that you have a Java program installed and running. If any error appears, the indication is that the Java program has not been successfully installed on your Macbook.

- The third step is to download the WeMessage program on your Mac.
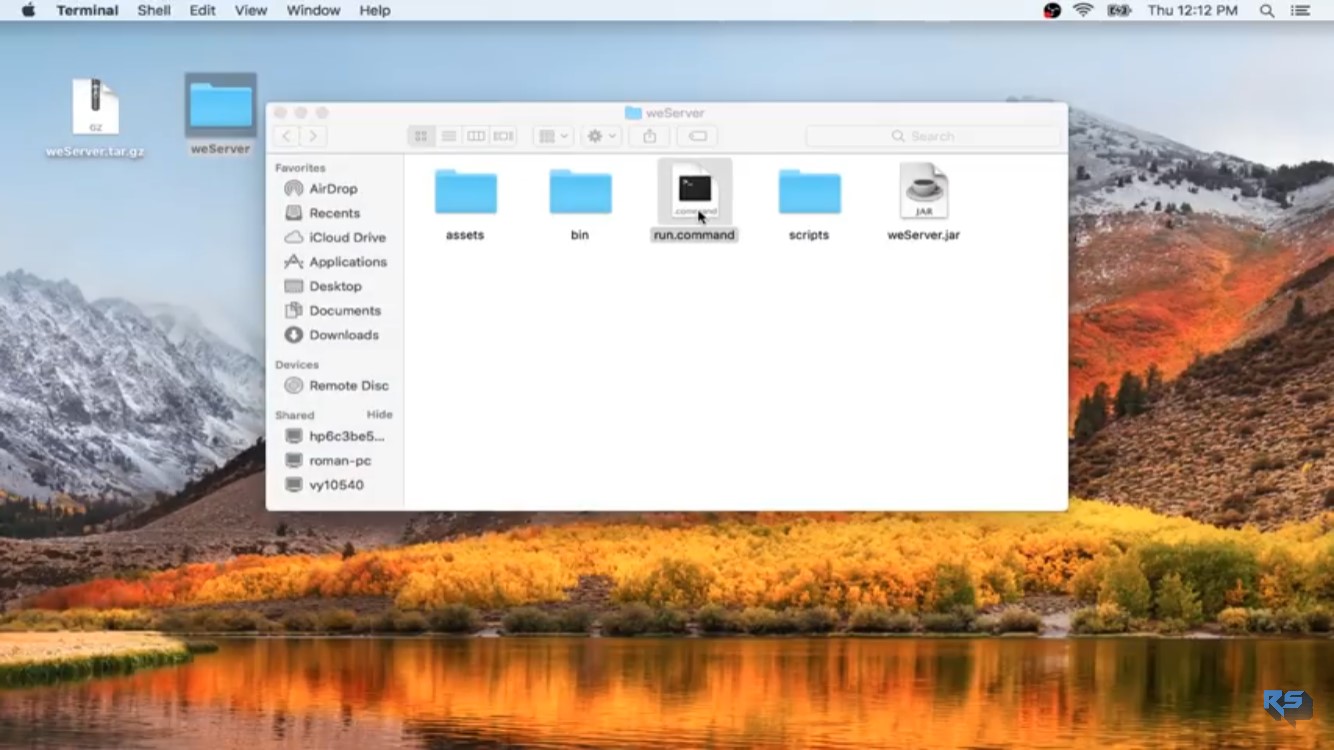
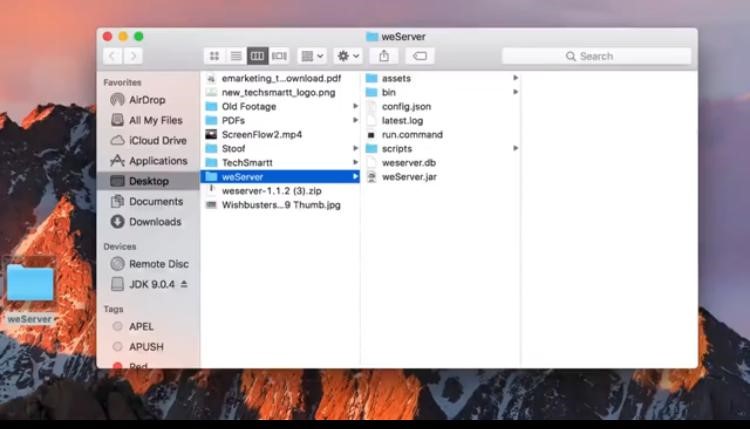
- Then you will have to open the WeMessage folder. Then click on the Run file in order to launch the weMessage on your Mac. In case an error appears that is saying that the file cannot be run because of an unidentified developer, you will have to open System Preferences. You can find the System Preferences in the menu on the top left side of the screen. Then you will have to click on security and privacy, then general tab. The option of open anyway will appear, click on it to launch the program.
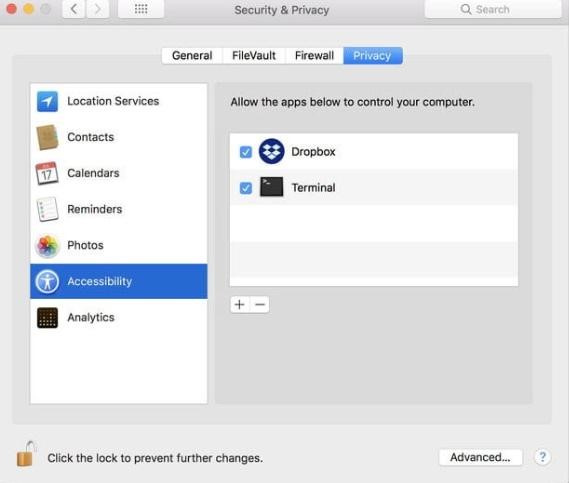
- Then you go to systems preference, then security and privacy, and then click the privacy tab. Then click on accessibility. This will enable some accessibility features on your Macbook,
- The sixth step is to click on the bottom left lock icon on your screen. Then you will have to enter the password that you use to open up your Macbook.
- Then click on the + icon. This will take you to Applications and then you will select utilities.
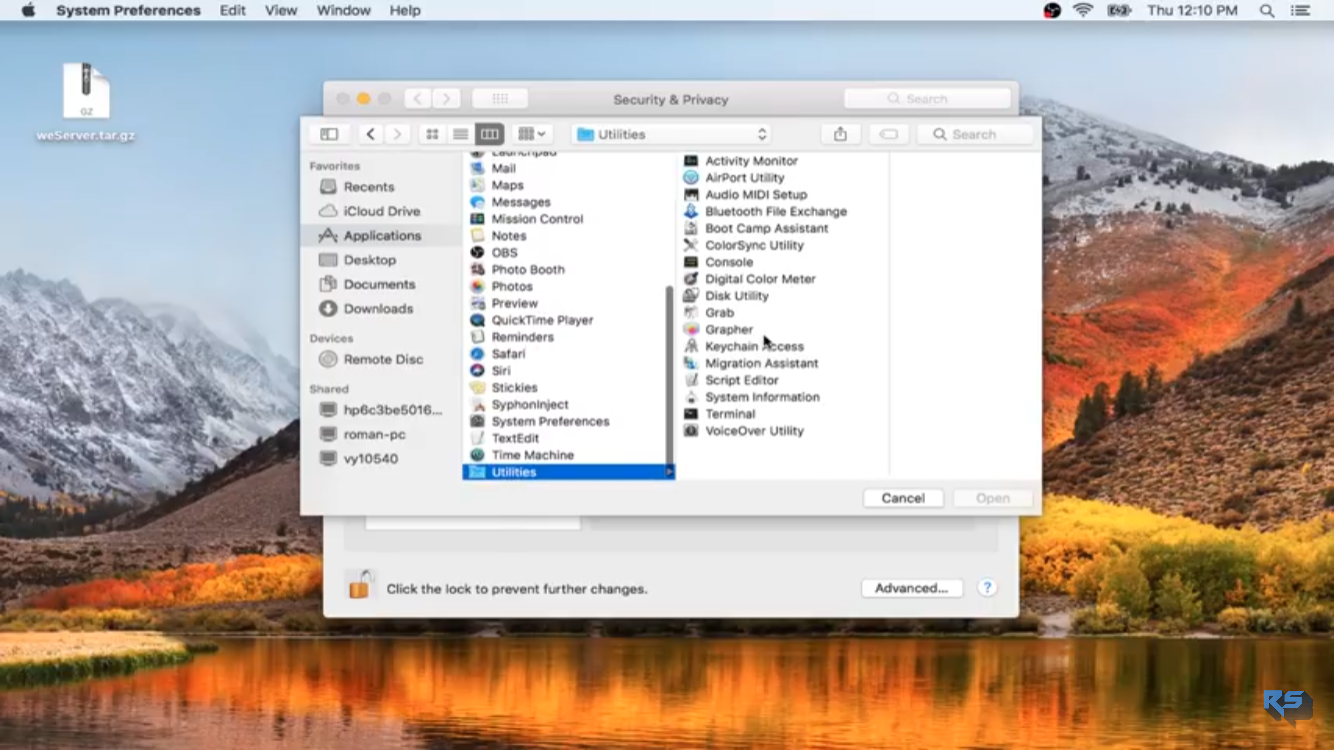
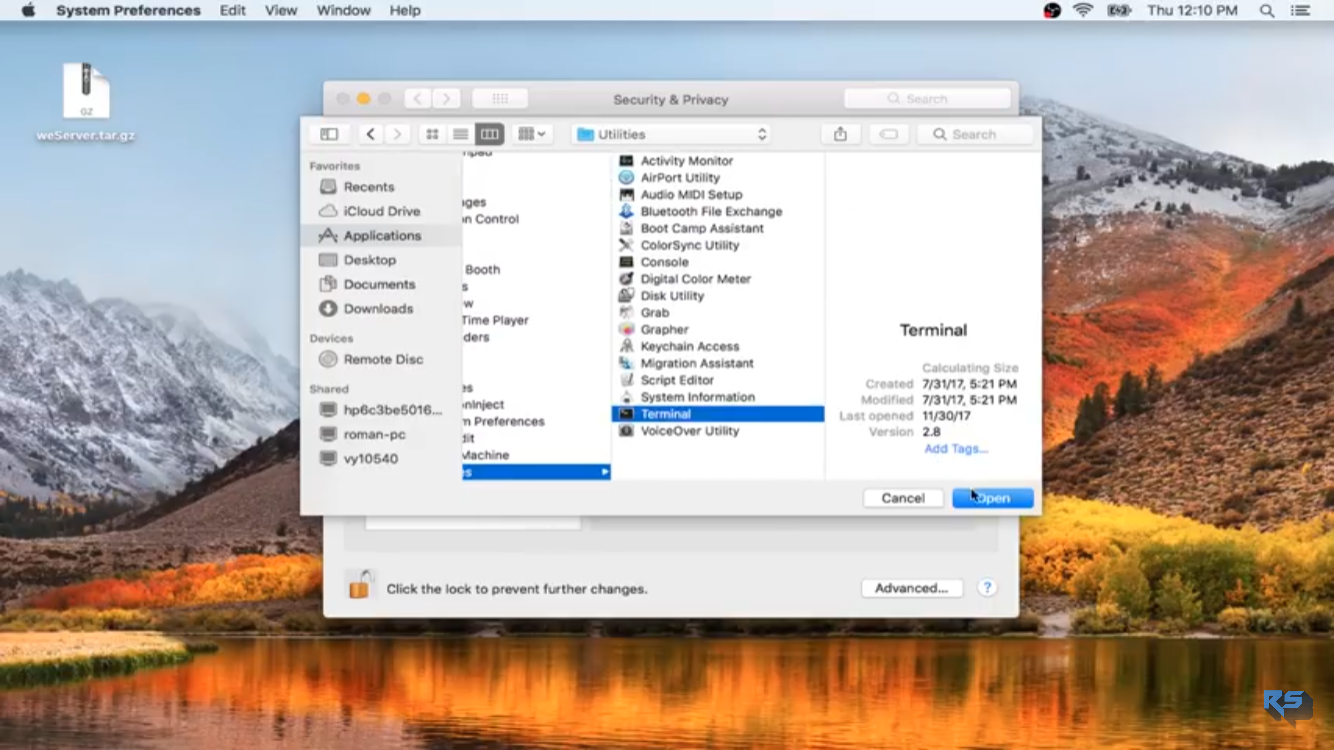
- Then click on the terminal. The option to open it will appear. Click on it.
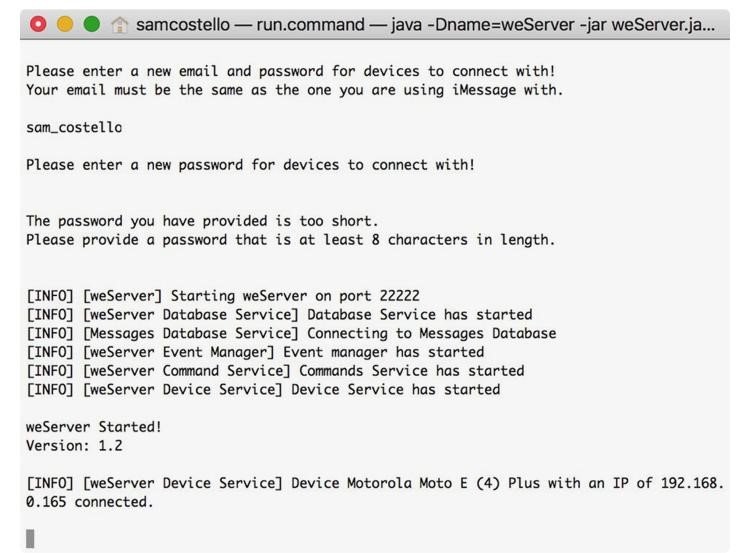
- Then click run on the command box that has appeared on your screen. This will launch a terminal window on your MacBook.
- Then you have to log in with the help of your Apple ID and password.
This was just the process to launch weMessage on your Mac. There are some steps that you need to follow in order to launch weMessage on your Android smartphone.
The steps are as following:
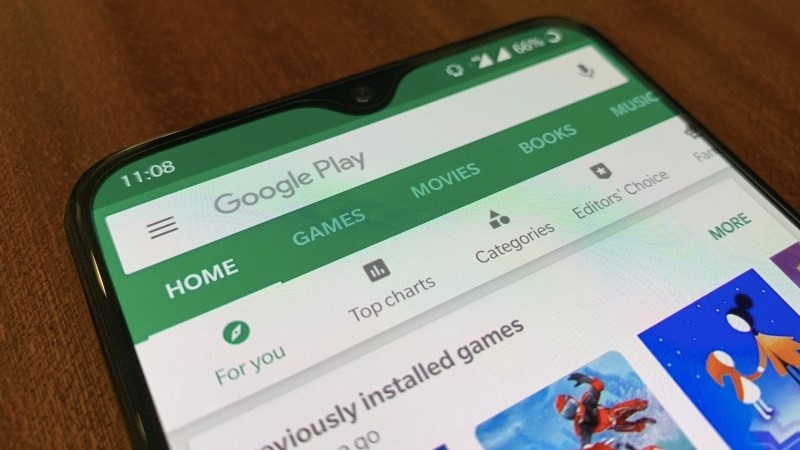
- Open Google play store on your Android smartphone and download the weMessage app.
- Then launch the application on your phone.
- Then click on continue. A pop-up window will appear on the screen, click allow to give access.
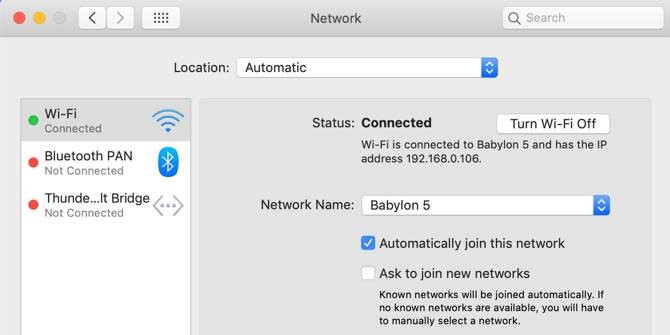
- For the fourth step, you will need to know the IP address of your Mac. You can find it by clicking on System Preferences, then network, advanced and you will be able to find your IP address.
- Then open the WeMessage application on your phone and enter the IP address of your Mac.
- Then you will have to enter the Apple ID and password that you used to launch the program on your Macbook. Beware, that you have to use the same ID and password or the launch will not be successful.
- The click on Sign in.
- If everything has been done correctly you will be able to see the conversation on the screen of your Android phone.
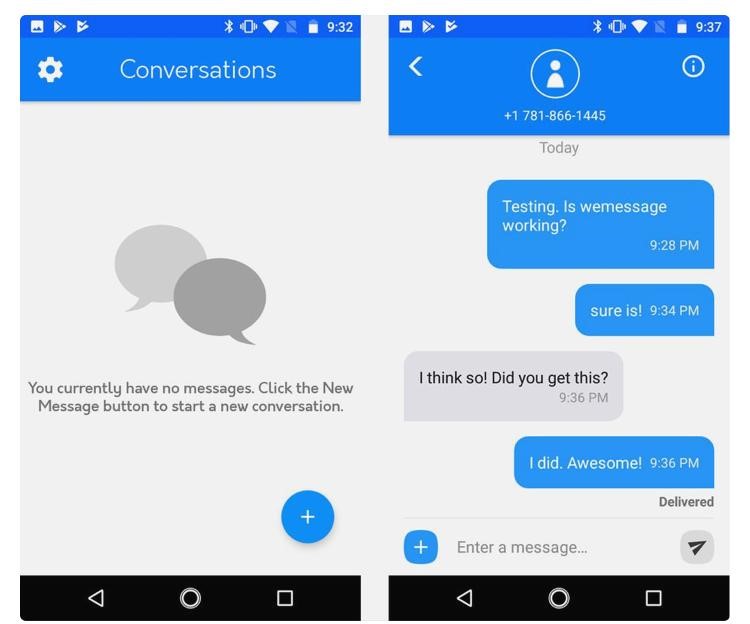
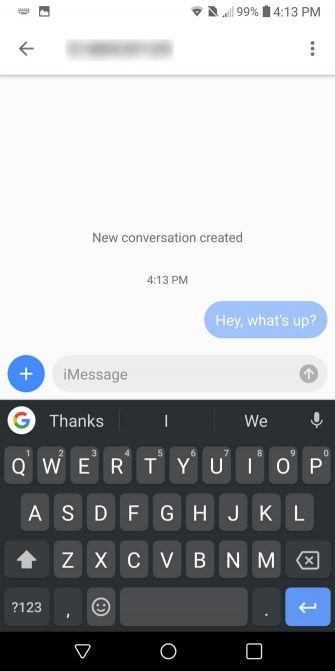
- Then you can start using the application. You can check it by sending a message to some iPhone user. If they receive your message in a blue bubble, it would mean that your launch and download of the application has been successful.
The only problem with this is that you can only use it when your android phone and Macbook are connected to the same WIFI and both are working. This is not very practical as you would like to use iMessage wherever you go. To make it happen you will need to set up Port forwarding.
Port forwarding basically configures your WIFI network. This allows the connections from outside. By doing it you will be able to use iMessages on your Android phone from anywhere you want.
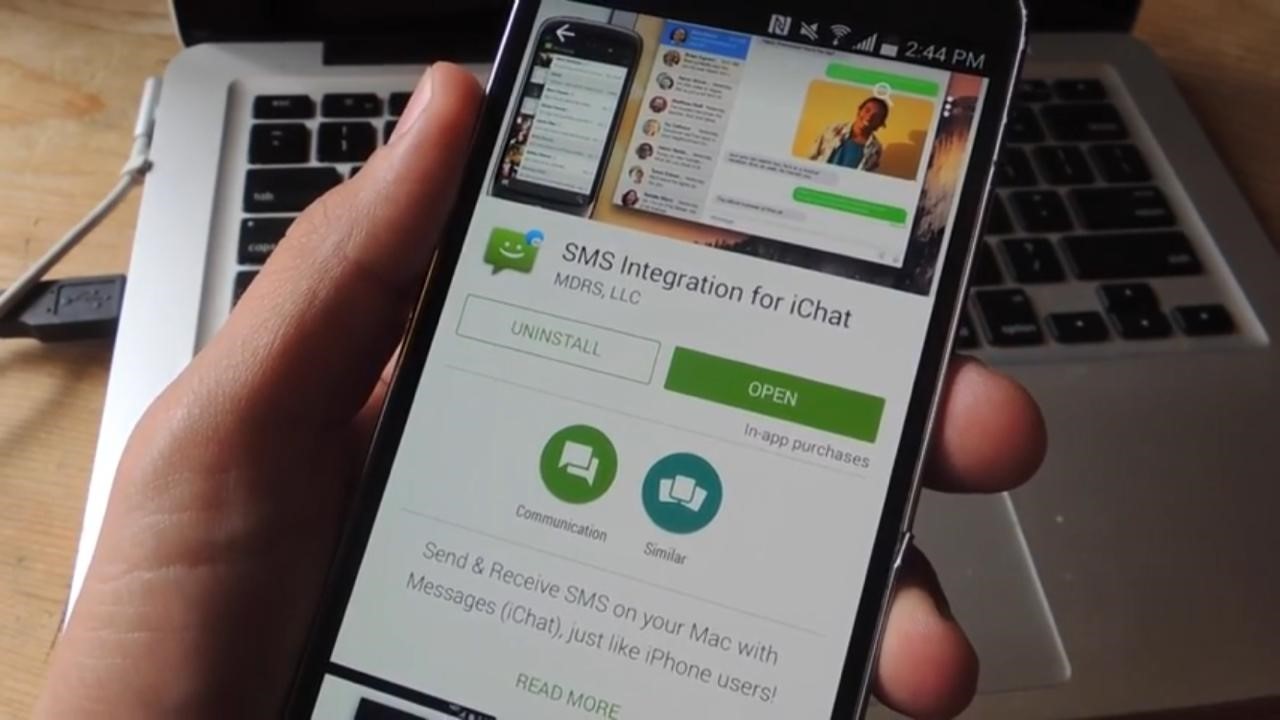
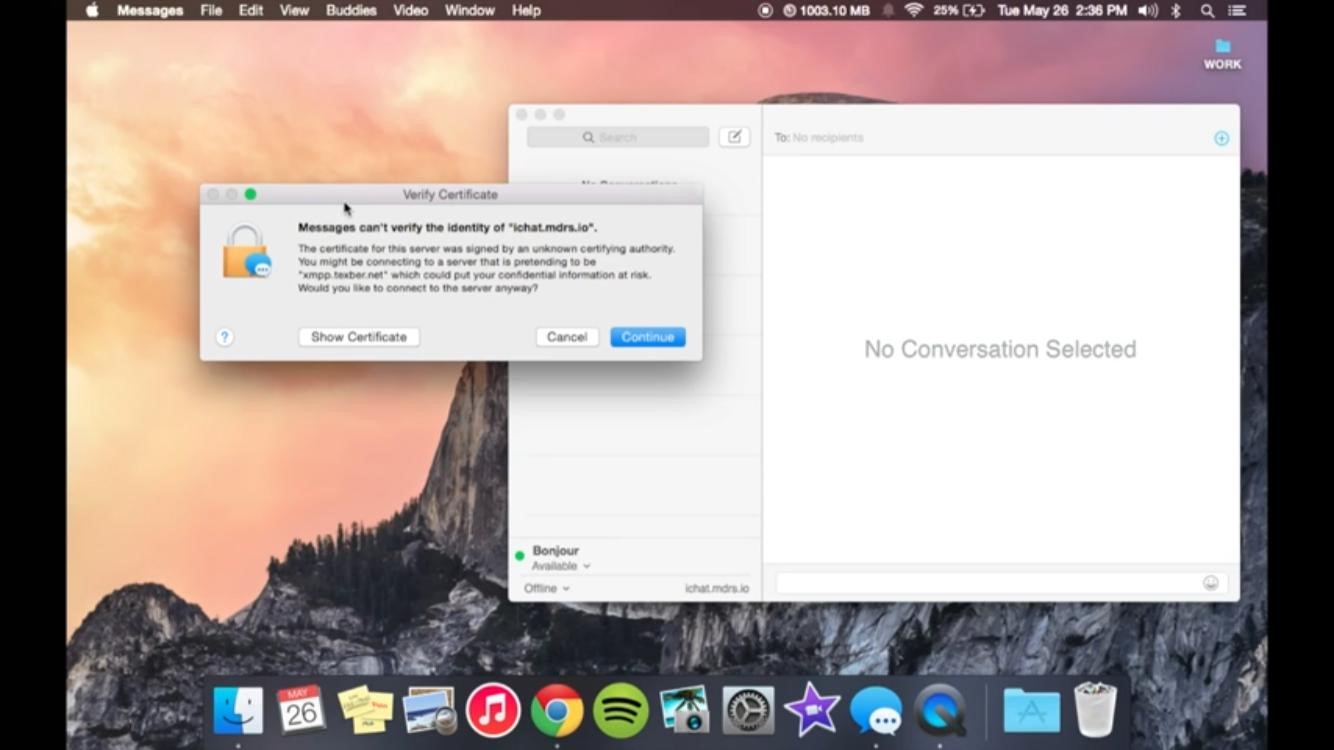
Method 2: Use “SMS for iMessage” (ichat) to send iMessage from Android
SMS for iMessage is also an application most commonly known as iChat. This allows the users to send messages through iMessages from an Android device.
The greatest disadvantage of this is that you can only send five messages for free. If you want to send an unlimited amount of messages you will have to pay for it. You will have to buy the full version in order to send unlimited messages.
This application also requires your Macbook in order to function. It routes the messages to your Android phone with the help of Macbook. So basically, the encryption of the messages is done the iMessage network.
The best part of using this application is that you do not need to download or launch this application on your Mac before using it. You just need to download this application on your Android smartphone.
Moreover, the process to set up and run this application is relatively easier as compared to other methods. This application has a very interesting feature, it stores the text messages so offline delivery could be made possible. However, it automatically removes the messages after 3 days in order to protect privacy.
This method requires users to download an application called ichat on their android phones. This application has been developed by Apple and is used to send messages.
This application was designed for Mac but now it can also be downloaded on Android phones. This google play application configures the messages from the MacOS and syncs it with the Android phone. In this way, the messages are encrypted from the Mac and the Apple iMessage network.
There are a few easy steps that can be followed to enjoy iMessages on your Android phone:
- Open the Google play store and download the ichat application.
- Launch the application once downloaded.
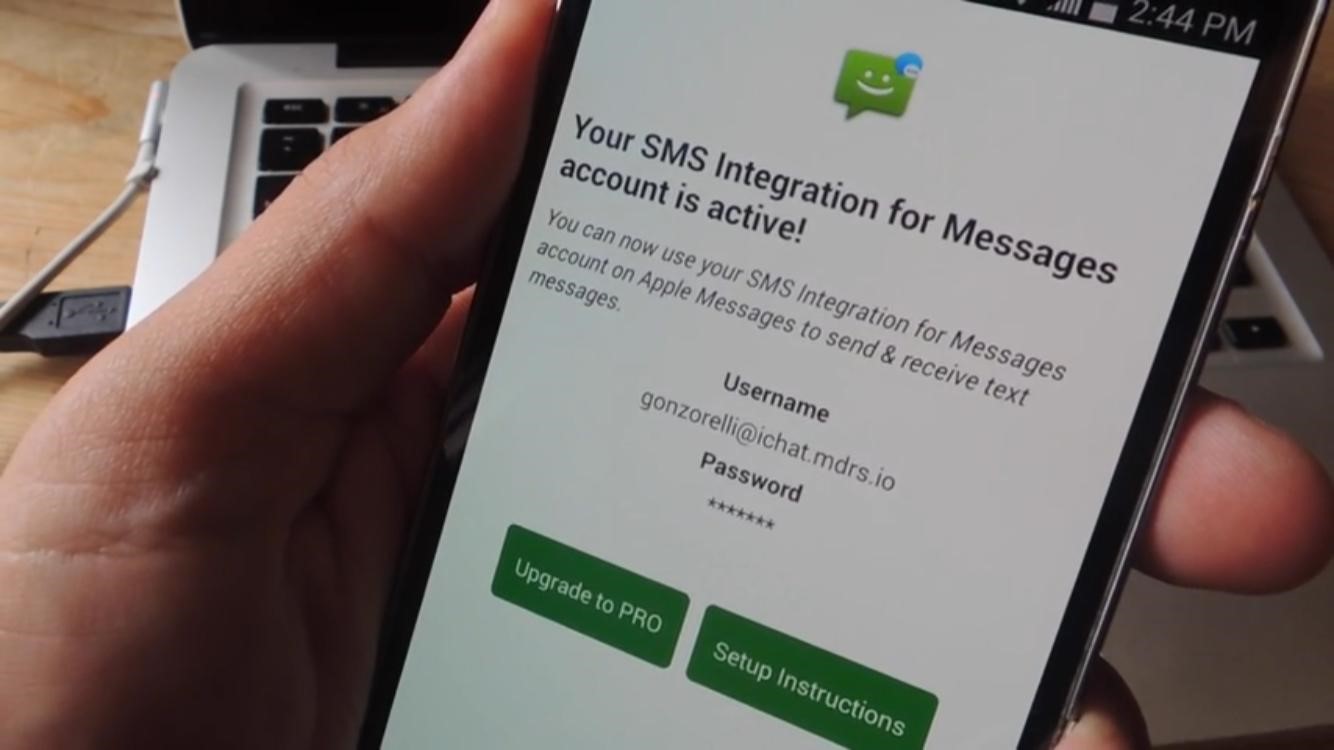
- The third step is to sign in with the help of your Apple ID and password.
- Once the password is entered you will be able to access the conversations.
Then on your Mac, you will have to enter your Apple ID and password. Leave the server and port options blank. Click continue on the verification messages and then you are ready to go.
 This method is very easy and can be easily completed. The major problem with this method is that you have to purchase the application to enjoy the unlimited version. This easy method comes with a cost. Moreover, the Mac needs to be opened and connected to a WIFI in order for the application to work on the Android smartphone.
Method 3: iMessage on Android with AirMessage and a Mac
So basically Apple does not allow the working of iMessage on Android devices. The application of iMessage is for Apple devices only. As the messages in the iMessage are encrypted so they can be used in Apple devices only. But there are multiple ways through which you can use iMessage on Android devices as well.
The solution we are giving to you is AirMessage through which you can use iMessage on your android devices as well. The basic function of Air message is that it allows Apple users to use iMessage on your android devices.
So basically this allocation provides two methods for using the iMessage on your android devices. Firstly coming on Mac clients they rely on multiple things for using the iMessage on android.
Setting up the Air message
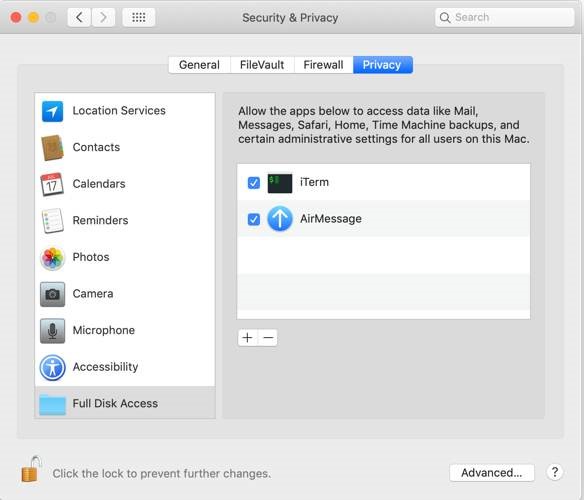
1. First you have to download the blue bubble server application on your Mac. Then you have to put that application in the specific folder named as application folder. If you are on Mojave to have to give certain some privileges to this application. To allow this application to read your message go to system preferences then security& privacy and then click on full disk access. And the Mojave users should follow this method system preferences then security& privacy and then on Automation. Then you have to enable the Air message.
- You can set the Air message through another method as well because the Air message application will not be opening in your Mac because it is from an unauthorized developer. So to deal with this first you go to the system preferences than on the general tab. You will see a message but you move forward by click on open anyway. Then you will get a notification to change the setting.
- After then go to the security and privacy setting and click on the privacy tab. After that scroll to the full disk access option. Then you have click on the lock icon after entering your admin password you have to click the plus button. And after that from the list of application select Air message. To allow this application you have to select the checkbox.
 You might in some cases have to change the port setting on your system. This is generally done so that the DNS provider can track an IP address change. You did not have to worry about this since the developers on this application have given the detailed instruction of this on their website. So in case of confusion regarding this, you can visit the website of Airmessage. This is not a long process but when you will read the instruction on their website your confusion will also be ended.
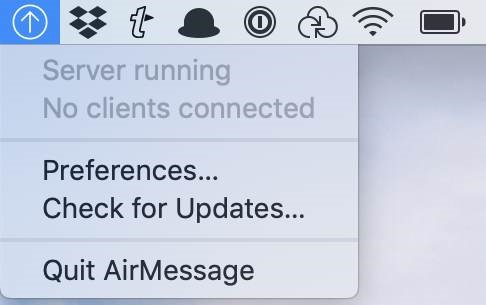
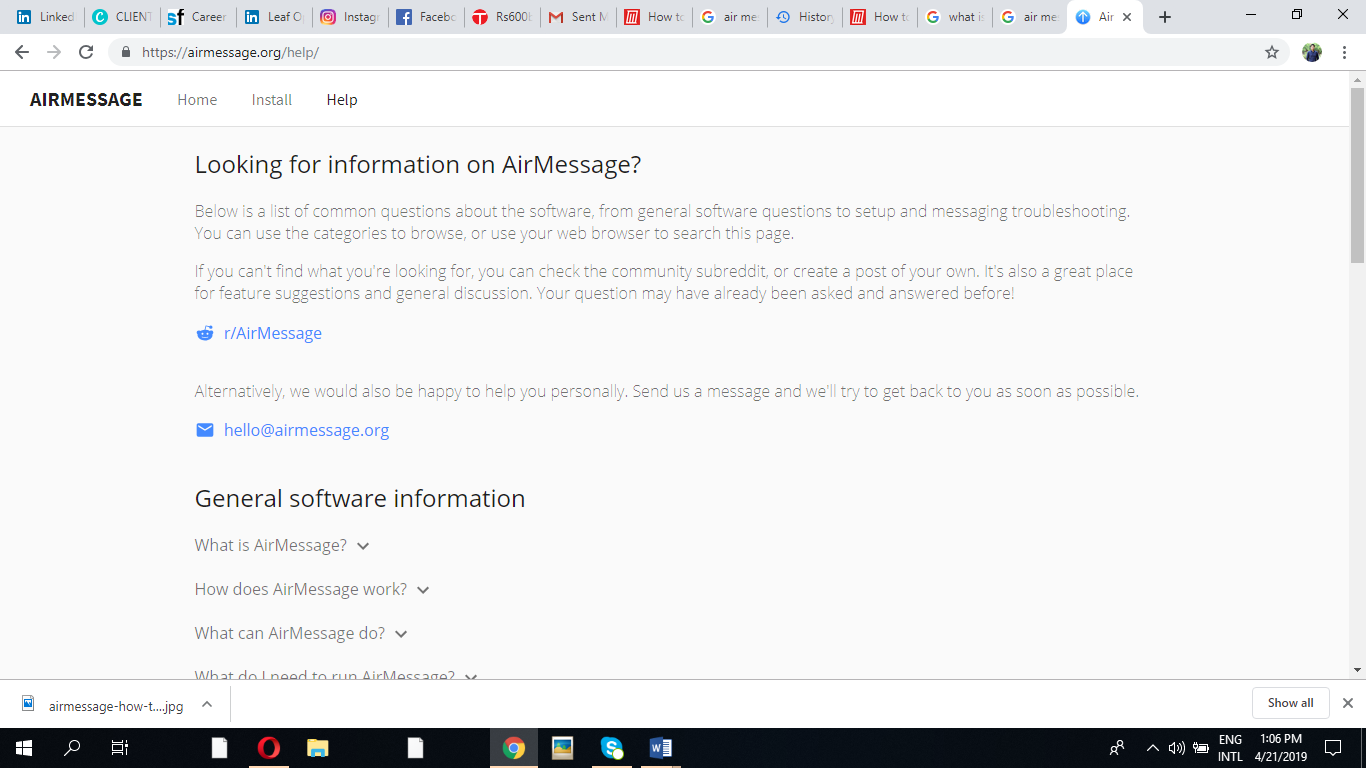 2. After you have the set up the Air message application on your mac in the first step. Now just have to open the Airmessage to just start the server. Before starting it you have to make sure that the menu bar on your Mac is showing the server is running. For the purpose of security, you might have to change the default password.
 3. Next, you have to set up the post as mentioned above that you can go the developer website for this as well. The other way is that you first have to note the IP address. Then you go the preferences after that go to the network and in the top of the window you will see that your networked is connected or not. From there you can get your IP address also.
 4. After that, you have to your router setting. For this, you go to 192.168.0.1 or 192.168.11 in your web browser for the router setting.
5. If this is not working you can get the information from where you got the IP address. In that setting, you to the TCP/ IP setting and you will find the router information.
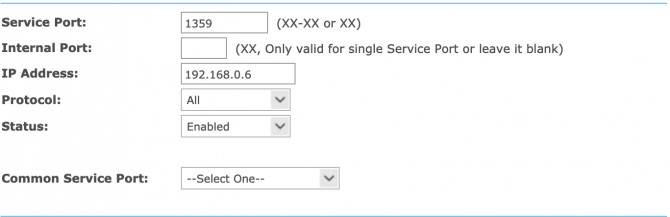
6. After that in the configuration panel. Go the Advanced tab and go to the port setting. After going to the menu create a new entry with IP address and the port which Air message is using. And for protocol, you have to click on the reboot your router.
 How To Set The Airmessage On Your Android Device
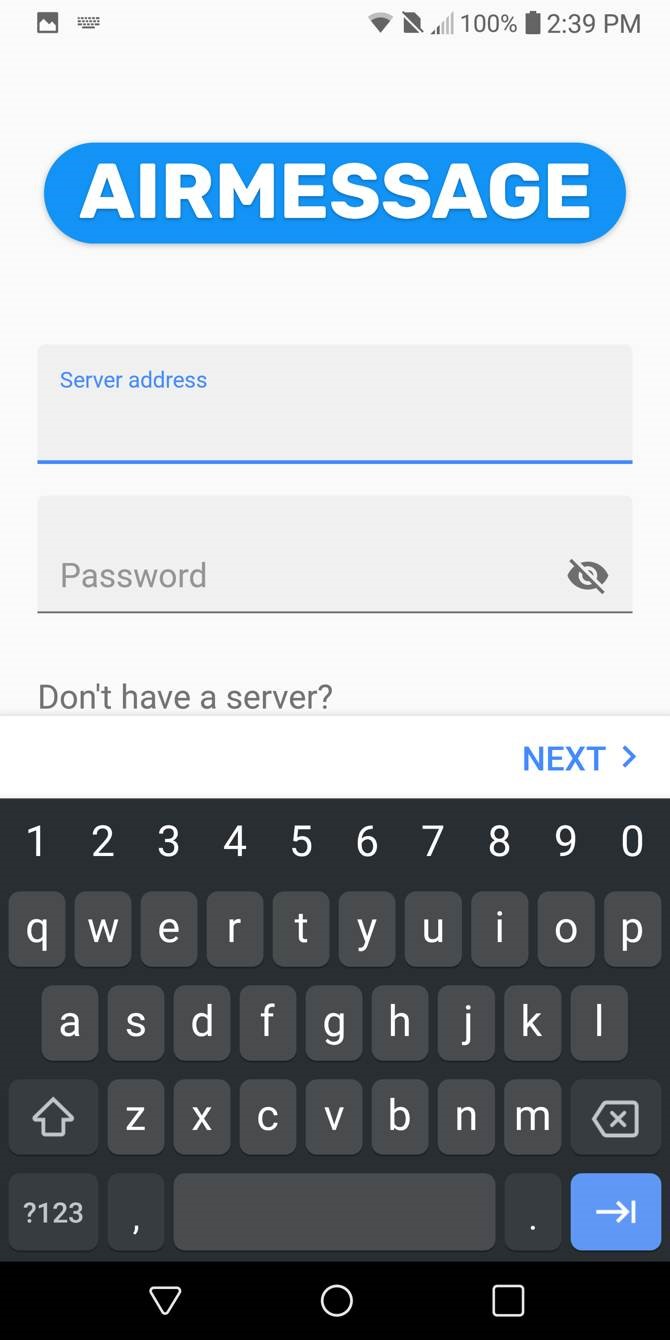
- First, you have to download the Airmessage from google play store.

- After installing you open the application then you have logged into your server.

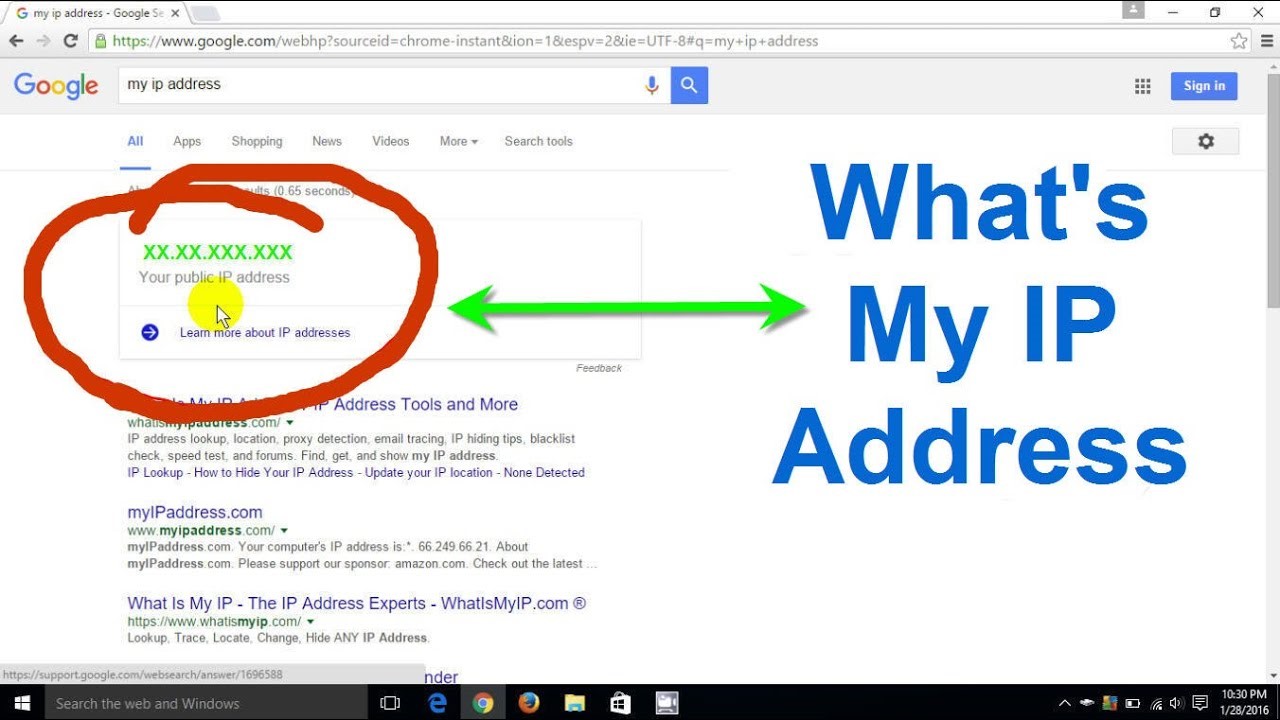
- The next step is to know your IP address you can find this by searching on google like what is my IP address.
- After finding the Ip address you have to enter it and also enter the password you have set up earlier.

- After this, you will be able to send and receive messages.
Both the methods mentioned above are easy to follow and use. You can use either of those to use the iMessage with android devices.
 iMessage Effects On Android
There are special chat effects that appear on chat when you are using iMessages. The chat effects can make the chat very interesting. For example, the loud effect, the message sent with this effect appears to be large and loud.
But all of these effects cannot be used on android as it requires 3D touch and that is available only on iPhones. Most of the android phones do not have a 3D touch.
From an android phone, these effects cannot be sent back to the Apple users. But still, iMessages are better than many other message options. Apple has protected these effects and they do not allow other platforms to use these effects, even when using iMessage on an android phone.
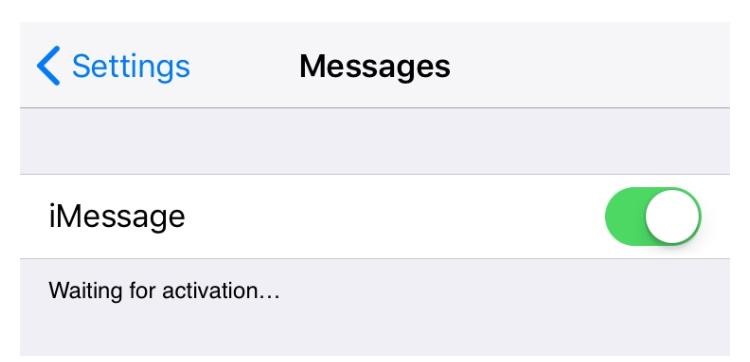
How To Fix iMessage Waiting Activation Error
The waiting error normally occurs when you change your number or the carrier. It may also occur when you are setting up a new phone. The waiting for activation error appears on the screen in the settings application. A message saying activation error or an error occurred during activation may also appear on the screen. The words of these messages might be different but they are the same messages. There are many solutions to solve this problem.
 Amongst all the methods that are available to fix the activation error, your phone needs to be connected to a WIFI or mobile data. For the first method check that your phone is connected to WIFI if not there is quite a possibility that the error is occurring due to it. iMessage does not work without WIFI or mobile data. After checking the connection try activation it again.
You can also try switching on the Airplane mode. Sometimes the problem is very minor and by turning the airplane mode on and off it might be solved.
The time of your device might be the reason for the error. When you are trying to activate iMessage the time of your device and the real-time should be the same. Apple servers create a problem if the time is not the same. To et the time you need to go to setting. Then go to general and then date and time. There will be two options available, one saying set time and the other set automatically. Select Set automatically. The time will then be automatically set on your device. Also, make sure that the time zone you are selecting is correct.
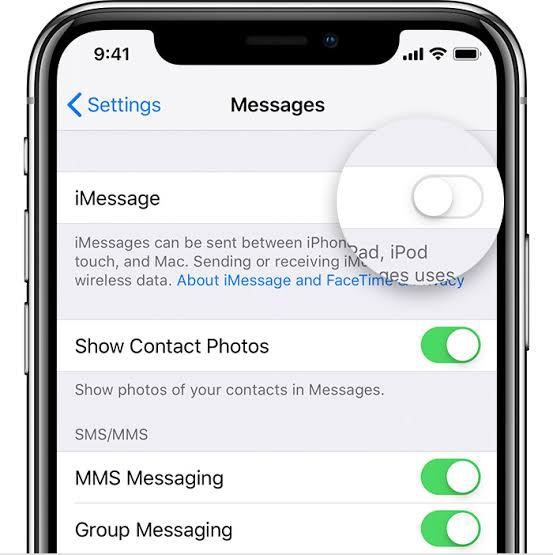 Another method is to turn off iMessage and then switch off your phone. Switch it on after some time. To switch off iMessage go to settings, then go to messages. Then turn off iMessage. After switching off iMessage reboot your device. You can reboot your device by pressing the home and the lock buttons for the older versions, and lock and volume button for the latest models of the iPhone. After rebooting the device turns on the iMessages.
The error might be occurring because your cell plan does not allow you to receive messages. This problem is surely hidden. When you try to activate iMessage, Apple servers send an SMS to the device. This SMS is not visible but it is sent to verify the device. If the cellular plan does not allow SMS, this means that the device will not receive the verification message and iMessages would not be activated. For this try to check your cellular plan.
You might need to add credit to your account if you are a prepaid user. This problem is related to the previous problem explained. If you don’t have the credit you will not be able to receive the verification message, so the iMessages would not be activated.
You can also try to reset the network settings. Apple sends a hidden verification SMS. In case you have a cellular or WIFI problem, an error inactivation might occur. To check and reset the network go to settings, then general and you can reset network services over there. Once you are done with the reset connect to the WIFI, if the problem is due to the network issue it will be solved. You can also try to reset your phone to solve this problem.
Sometimes the error occurs due to the old version of the IOS, you can also try to update your IOS and then try activating iMessage. Or you can simply wait for 24 hours. Sometimes the activation process takes longer than expected. Waiting might help. Sometimes by just simply waiting the problems get solved.
iMessage On Android – Conclusion

It is best to use iMessage on Apple’s own devices that include the iPhone, iPad, and Mac. As the best features of iMessage can be enjoyed on the Apple devices.
However, if some users do not want to use the Apple devices but still can’t resist the iMessages and can’t avoid the blue bubble messages they should opt for the message method.
This method is the most famous to use iMessage on the Android phone. The WeMessage method is difficult to launch and it is a lot of work to set up, but once it is done, it is the most efficient.
You can use iMessages anywhere once you set up the port forwarding. This method is also free of cost and most reliable.
The other two methods are not as efficient as the ichat method is costly and users have to pay in order to use the application.
You can also Read Trend Liff Other Guides Too!
- How to use iMessage stickers?
- How to know if someone blocked you on iMessage?
- iMessage not delivered