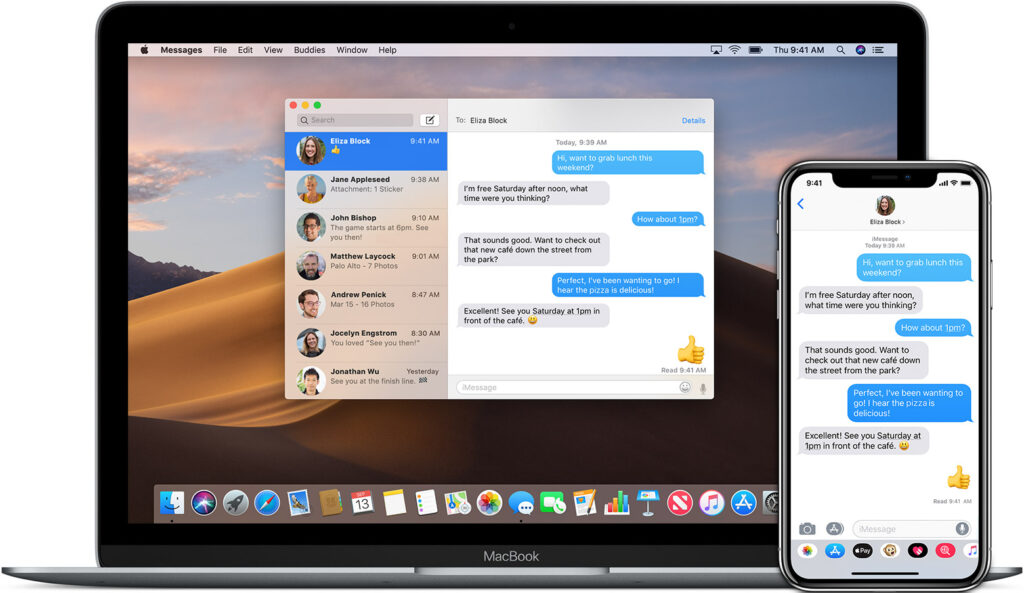
iMessage on Mac makes your life much easier. As you can stay connected with your friends even when not using your phone or while you are working. iMessage is the most convenient way for Apple users to communicate as it is fast and effective.
Getting iMessage on your Mac book is not difficult and you can get it in no time. You just have to follow these easy and simple steps in order to get iMessages on your Mac. And believe it, your life would be made easier.
Three Methods By Which You Access iMessages On Mac
1st Option: Set Up Messages On Your Mac Book
You just have to follow these simple steps:
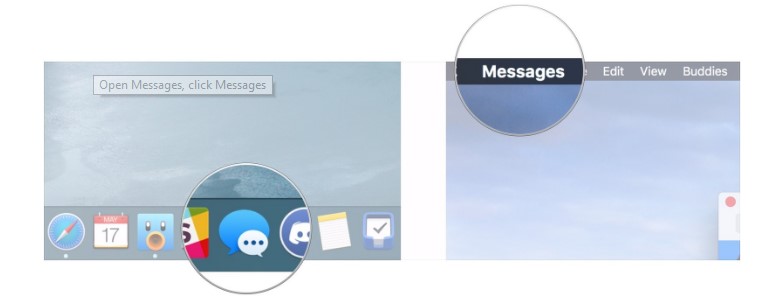
- The first step is to look for messages on your home screen. You might find it in the dock or the applications. Once found you have to launch the messages.
- The second step is to log in with the help of your Apple ID. You just have to enter your Apple ID and the password to get started. In case you have two-factor authentication turned on your Apple ID you will also have to enter the verification code that you will receive through an SMS.
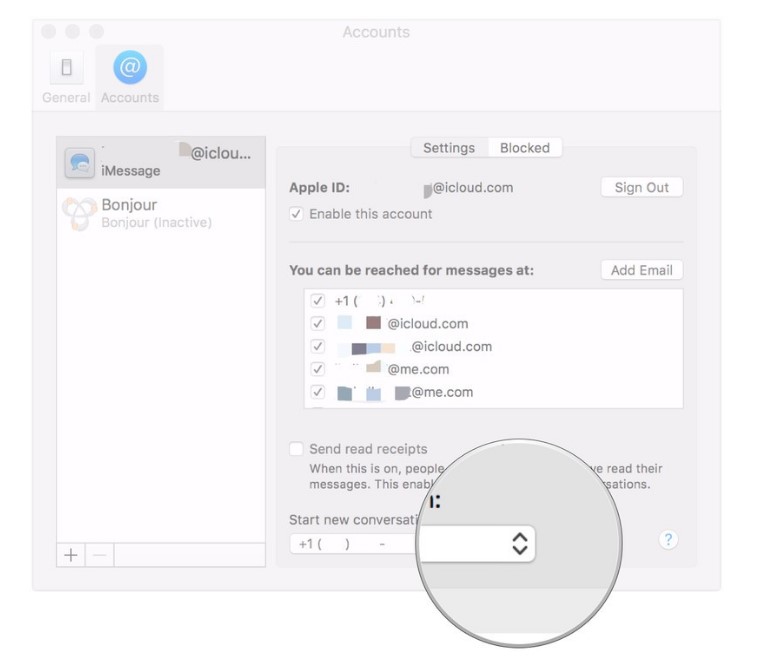
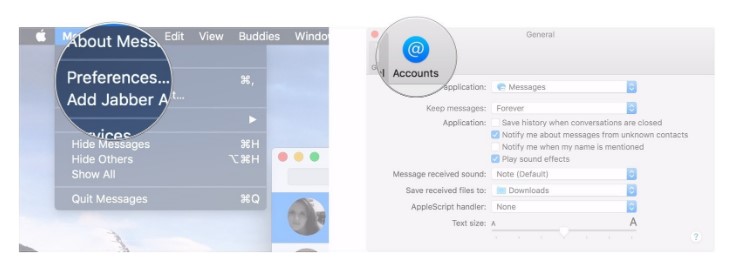
- Then open up the menu bar. In the menu bar, you have to select messages. Then you will select preferences from the given options.

- More options will appear and then you have to select the Accounts tab.
- Then you will be asked about the phone number and the email address on which you should be contacted.

- The sixth step is to just simply enter the phone number and the email address that will be visible to people when they are trying to contact you. Voila! Your iMessages have been set up on your Mac and now you can enjoy a quality experience of messages.
 2nd Option: Set Up iMessage With iCloud In Your Mac OS
Setting up iMessage with your iCloud would help you to keep the messages on your phone and your Mac in sync. This also allows you to use iMessage from where ever you want. In this method, your messages are also secure and can also be easily recovered.
Moreover, if you change your phone or Mac you can also set up the messages on the new device. There are easy steps to follow if you want to set up iMessage with the help of iCloud on your Mac. The steps are as follows:
- At first, you will have to open Messages from the menu bar on your Mac Book.
- Then you have to click on preferences from the given options.
- The third step is to click on the Accounts tab.
- Then you click on the iMessage account. You would then have to enter your account details in order to log in. enter your Apple ID and password.
- A checkbox will then appear on the screen. You have to click on it. Then you will be able to see the option of enabling iMessages on iCloud. Just click on it.
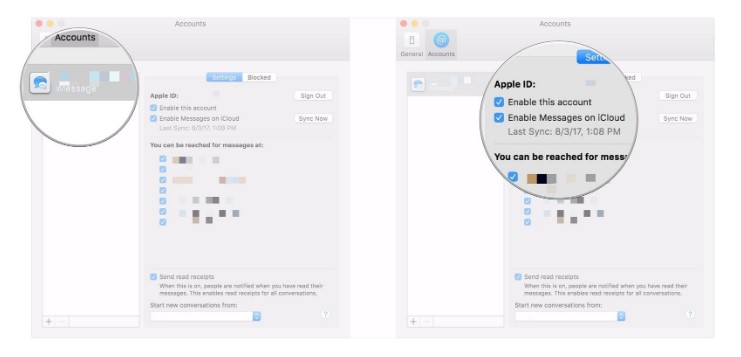
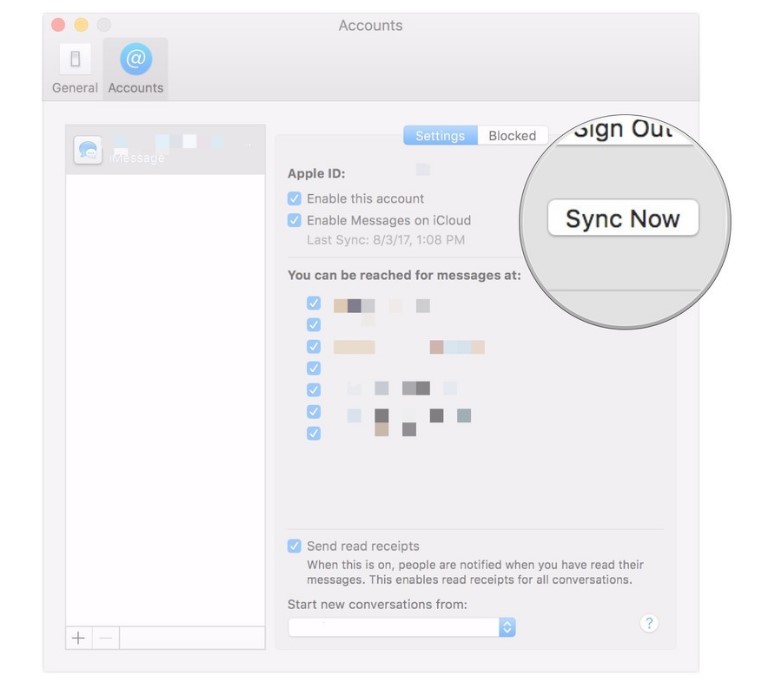
- Then you have to sync the data. A Sync Now button would be there just click on it. By doing so iMessages will be set up on your Mac and they would also be synced with your phone making it very easy to communicate.
3rd Option: Use IMessages In Icloud With IOS 11.4
This method is for the more advanced version of the IOS. As the previous two methods explained might not be compatible with using iMessage on your Mac. You will just have to follow these simple steps.
- First of all, you will have to be sure that IOS 11 is enabled in the iCloud, otherwise, you might have problems syncing your iPhone.
- You have to open the setting on your iPhone. At the top of the settings, you will be able to see the Apple ID banner. Click on it.
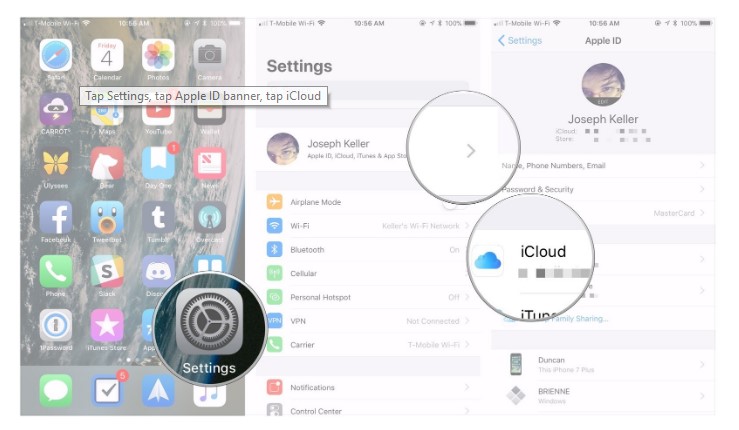
- Then many different options will appear. Select iCloud.
- Once again there will be a list of iCloud enabled and disabled applications. Make sure the messages are enabled.
- Then you will have to click on Apple ID and then click Settings.
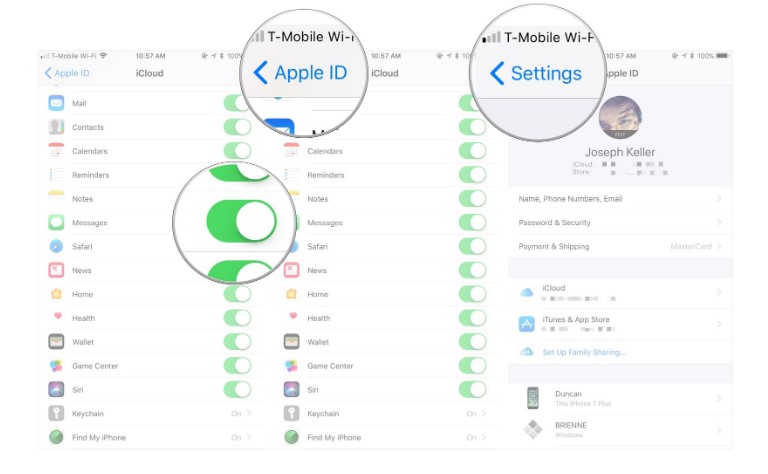
- Then select the messages.
- Now click the sync button. This will allow all your messages to be synced with iCloud.

Then you will log in to your Apple ID on your Mac Book and now you can easily access all messages online on your Mac.
You can also Read Trend Liff Other Guides Too!