
What Is Jabber iMessage? Jabber is referred to as a less technical and more familiar name which is associated with the ‘Extensible Messaging and Presence Protocol'. It is the technology for instant messages and communication. XMPP is the abbreviation used for Extensible Messaging and Presence Protocol.
This message-oriented communication protocol is based on an extensible markup language. It is an open service and is not limited to any specific user, it is for the public.
These are a set of capabilities that are running on one or different devices that are being delivered in a variety of ways. From capabilities, we are referring to the services which can be counted under extensible messaging.
Instant messaging, group chat, instant call, softphone, call history, voice mail integration, desktop sharing, and video are few listed capabilities. Not all of these capabilities are provided together on one device, some may be missing for obvious reasons and features.
The iOS devices which have jabber includes iPad, iPhones, iPods, Apple PCs. For delivering the above-mentioned services on all these devices there are two options internal and external. An internal environment has to build up for the accessibility of the service.
However, for some features such as group chat and instant messages iCloud space needs to be made externally available for processing.
There are two different application options available for Jabber iMessage. Jabber IM and Cisco Jabber to be named. Jabber IM provides chat presence and director integration which is such a rich feature that we can detect when the other user is on call on the other side of your Apple device.
Also, read our 5 Best Methods To Access iMessage On Pc
How To Add Jabber Account In iMessage On MAC?
 In order to set up a Jabber account on a Mac, you have to follow the following sets
- Click on message on the extreme top of the left side of your screen
- Choose preferences, which is the third option
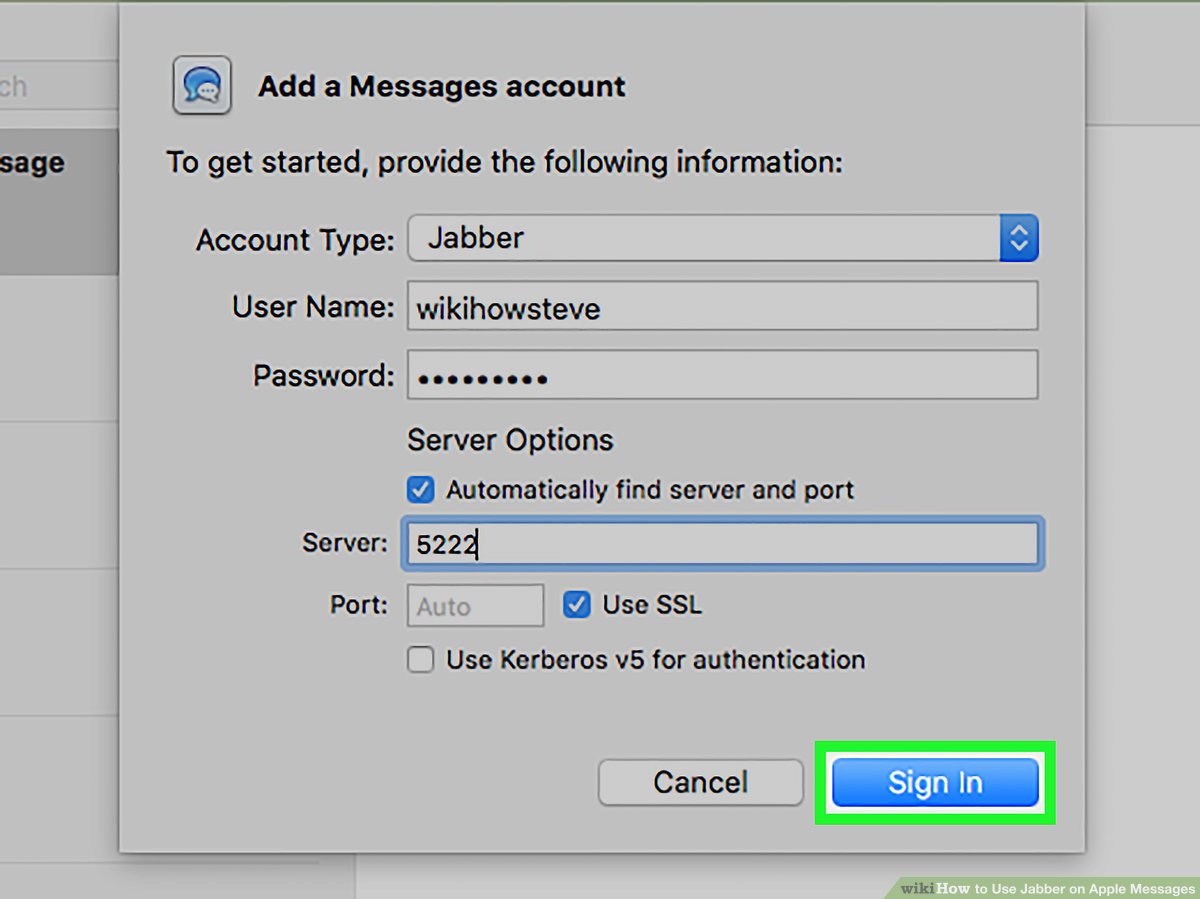
- An accounts list will appear on your screen, and if you do not have an account you have to make one by clicking on the ‘+ (plus)’ which is on the left bottom of the screen. This will take you to another menu from which you have to choose ‘Jabber’ and type the details of your jabber account, which includes your jabber account name and password. Click continue after typing password this will introduce you to your Jabber account.
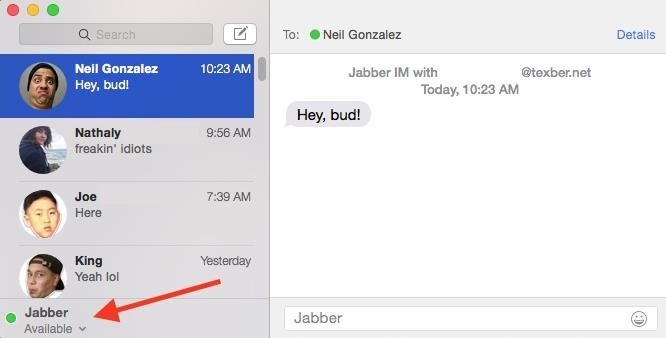
Now since the jabber account is created you will be able to send a message to any Jabber account from your Mac. To see how many of your friends from your contact list are on Jabber you need to explore the ‘buddies’ option.
This does allow you to bring your personal contacts and work contacts together. It makes it easier for you to stay connected to your loved ones without compromising your work.
How To Enable Jabber Auto-Updates On A Mac?
There are chances that Jabber might not auto-update after being installed and you need to do it manually. This might be because your iOS version is not updated and does not provide you auto-update facility. A shortcut needs to be created to enable the auto-update on a Mac.
Follow these steps to enjoy Jabber auto-update
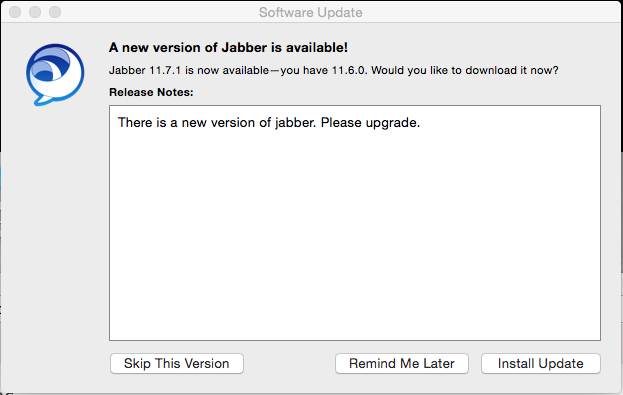
- Problem identification is the first step. This will let you know what exactly you have to fix. If the following request to update keeps on showing even after the upgrade then jabber is not auto-updating.Logging out and then again logging in to the Jabber account might be helpful. This what the pop message will look like.
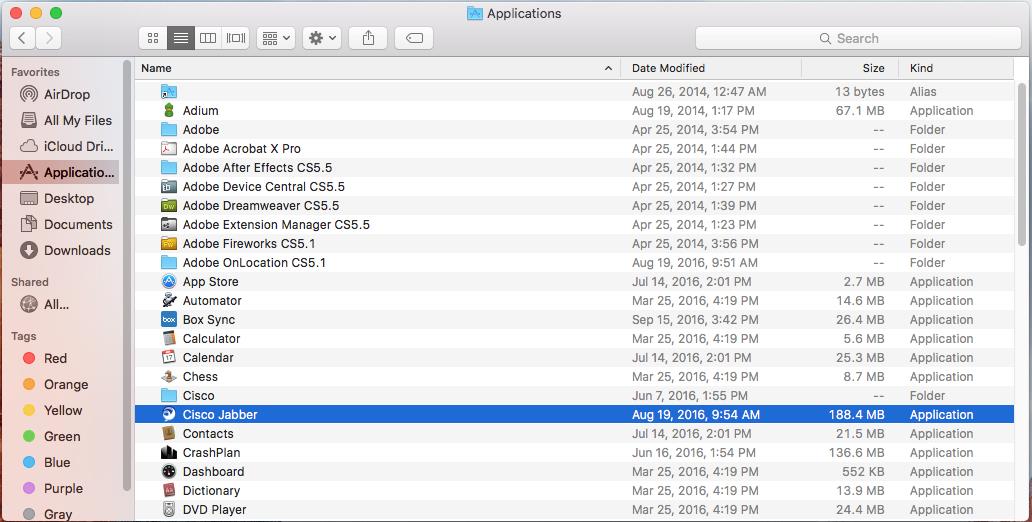
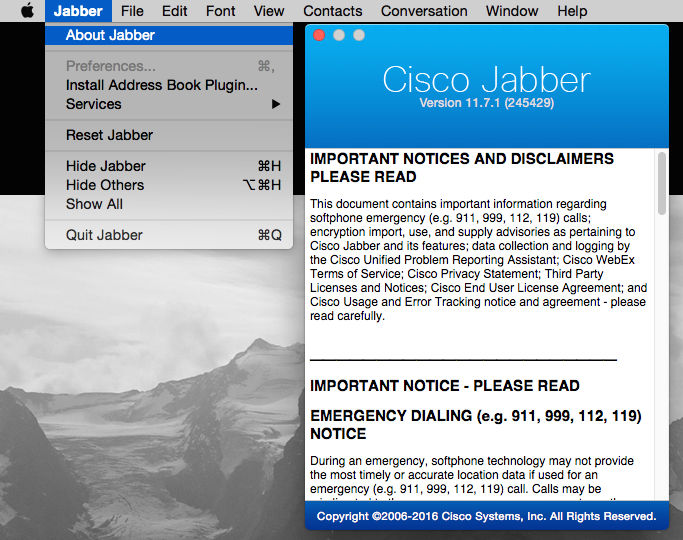
- At times this pop up may keep on showing when the jabber update has not installed. So a double check should be done to check that the Jabber update was installed. This could be done by launching a finder and searching for Cisco Jabber and then selecting it by double-clicking it.
- This will lead you to the Jabber’s menu bar which will appear on the top of the screen. A window will appear when you will click ‘About Jabber’, this is from where you will get to know about the running version. The version should be 11.7.1 (245429).
- At times the update is installed but it does not work. In this case, you need to remove and replace the shortcut to the older version of Jabber. To remove the shortcut and add the new shortcut you need to follow these few simple steps
- Control + Click of the Jabber icon in the application dock
- Choose ‘option’
- Choose ‘remove from dock’
- And then drag the new Cisco Jabber icon from the application folder to the dock which you have already saved as the new shortcut.

- Here is another way to remove the old shortcut and add the new shortcut folder of JabberClick the main ‘Apple Menu' and select ‘System Preferences’ from it.
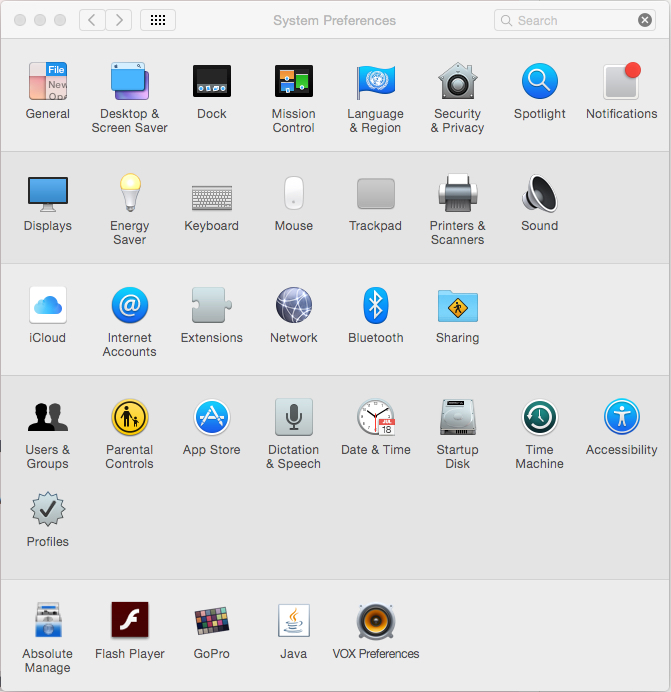 This will lead you to a page full of different options from this you need to click ‘User & Group’
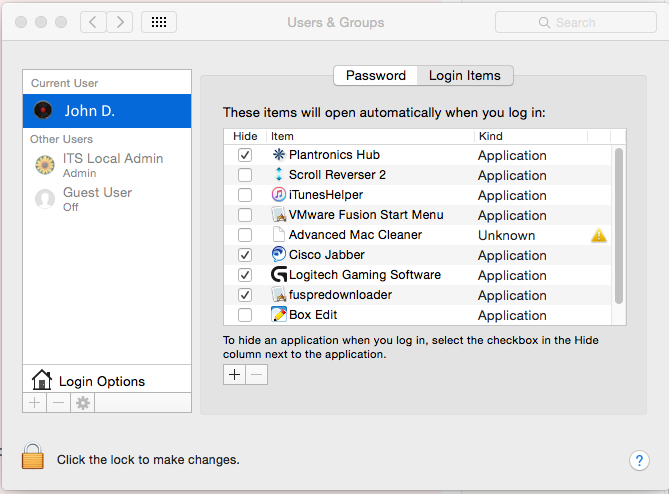 Now select your user name and click ‘Login Items'. This will open a checkbox from which you have to click on [-] to remove the old shortcut from the Cisco Jabber Window.
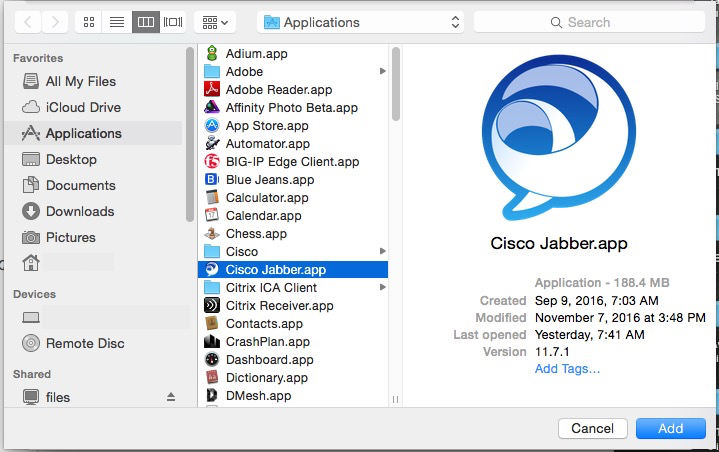
- Select [+] from the list of applications
Now click Macintosh HD > Applications and select Cisco Jabber and then Add.
 After adding the new shortcut auto-update will enable on your Mac.
Jabber iMessage – Conclusion
iMessage Jabber allows us to instantly contact each other through chat, also known as instant messages. We can make both an audio and a video call through this.
It gives you a completely new experience of connecting people through instant messages with countless features. Jabber iMessage is a must to have on your Mac.
To enjoy a better experience of using Jabber it should be updated so you do not miss out on any new feature.
You can also Read Trend Liff Other Guides Too!