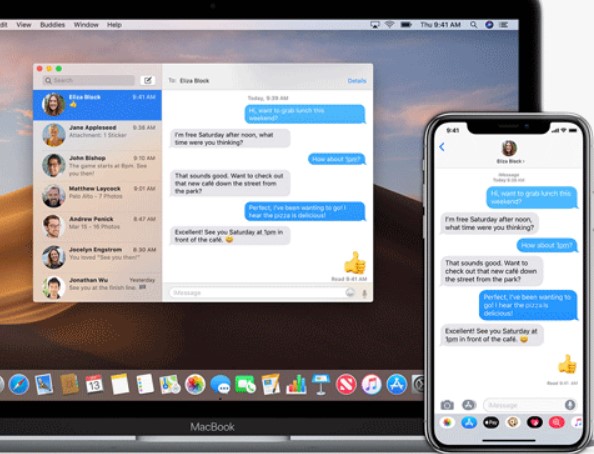
iMessage is a messaging application that was introduced by Apple to make messaging more convenient for its users. However, this application is exclusively for Apple users and cannot be accessed by Android, Windows, or Linux users.
The iMessage application has attracted many individuals towards Apple products and it is one of the main reasons Apple does not provide iMessages on Android and Windows.
The advancement in hacking and cracking has led to finding ways in which iMessages can be accessed on Windows. This makes it very convenient for individuals who are obsessed with the blue bubbles but at the same time, they want to stick with the Windows. Here are a few methods with which iMessages online can be accessed on Windows.
How Access iMessage Online On Windows?
1) iPadian
Step 1: The first step is quite easy. You will have to use your Windows PC. Connect the PC with an internet connection and browse for the iPadian iOS emulator. You will need it to run the iOS applications on your Windows.
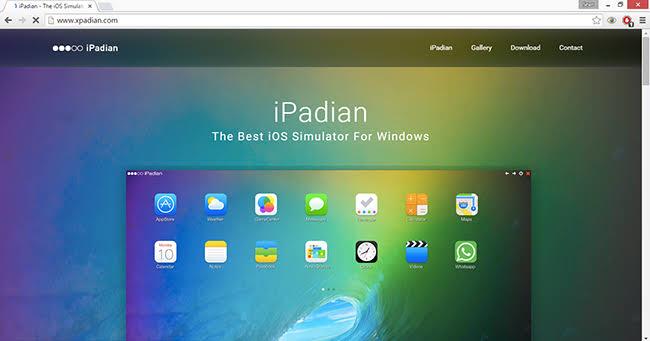
Step 2: The second step is also easy. You will simply have to use IDM to accelerate the downloading process.
 Step 3: Once the application has been successfully installed, you will have to run the program on your Windows PC. You will also have to decide where you will introduce the application on your PC. You can place it in an already existing file or can even make a new file for a specific purpose.
Step 4: when you have successfully completed the establishment of the iPadian iOS emulator on your laptop, you will then be able to work on other tabs. Then you will have to go to the alternate work area and then dispatch the iPadian emulator. This will allow you to use iMessage on Windows.
Step 5: When using the emulator for the first time, it will require you for your Apple account details in order to sign in to your account.
 Step 6: Once you have successfully entered the principal work area, you will be able to completely recognize the area, it will look like an application on your iPhone. You will then have to search for the App Store.
Step 7: The last step is to introduce the iMessage application on your laptop. You will simply have to run the application and then you can enjoy iMessage on your Windows PC.
 2) Chrome Remote Desktop
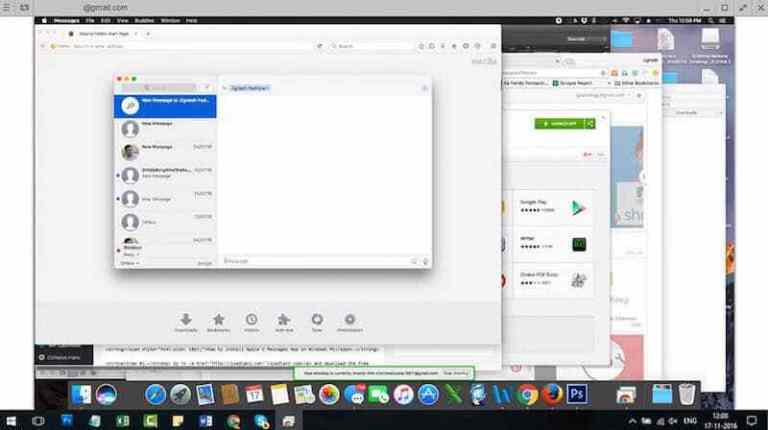
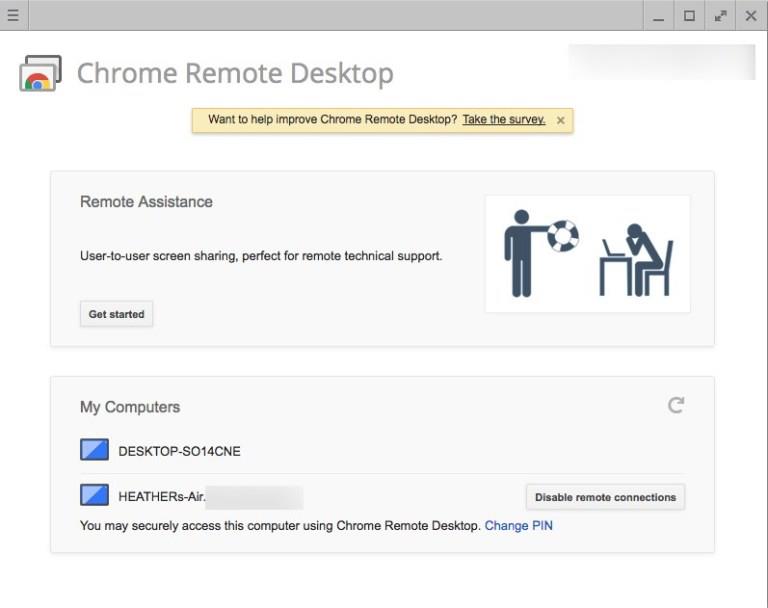
In order to use iMessage on Windows with the help of Chrome Remote Desktop, you will need both Mac Book and a Windows PC. You will also need to have the Chrome browser on both laptops. It is very easy to download the Chrome Remote Desktop. Here are a few steps that need to be followed to install Chrome Remote Desktop on your Mac.
Step 1: The first step is to sign in to the Chrome browser with the help of your google account. In case you don’t have a Google account you will have to make one.
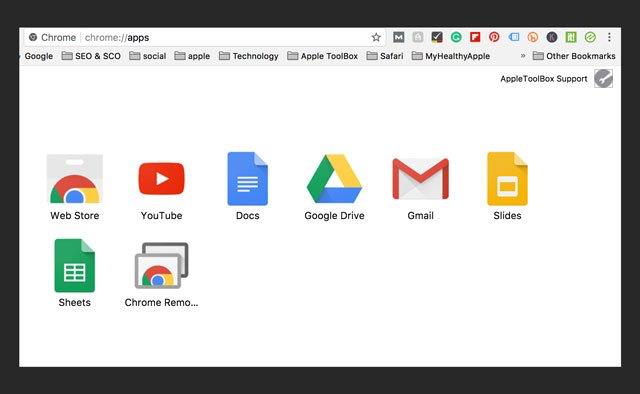
Step 2: Then you will have to download the Chrome Remote application from the Chrome App Store.

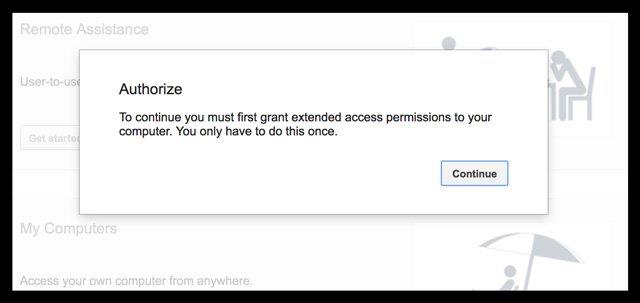 Step 3: When setting up the application you will see a pop-up message on the screen saying to authorize. You will have to authorize it.
Step 4: After the authorization, the Chrome Remote Application will appear in the application list. Open the application.
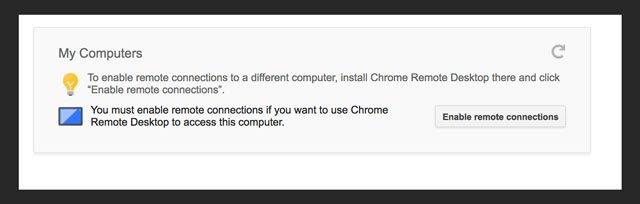
 Step 5: Then you will have to enable the remote connection from the pop-up that will appear under my computer tab. After enabling it simply follow the instructions.
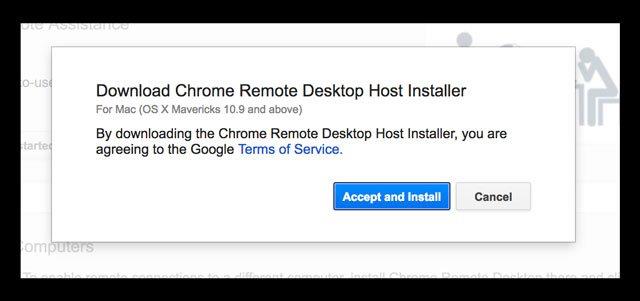
 Step 6: Then, in the Download Chrome Remote Desktop Host installer simply accept and install.
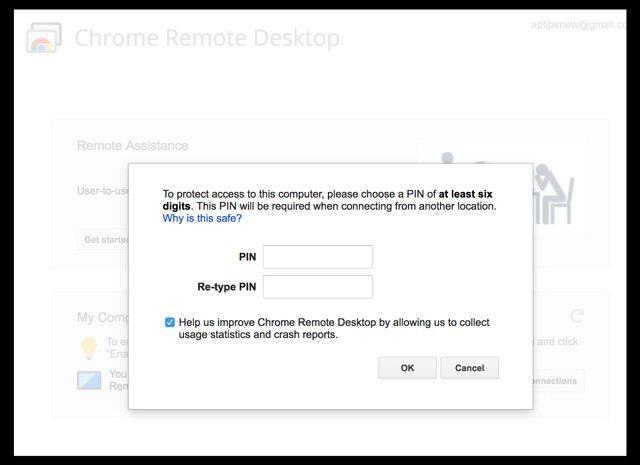
 Step 7: Once it has been successfully installed, enable the connections, and create a pin. This pin is very important as it will help to create a connection with the Windows PC.
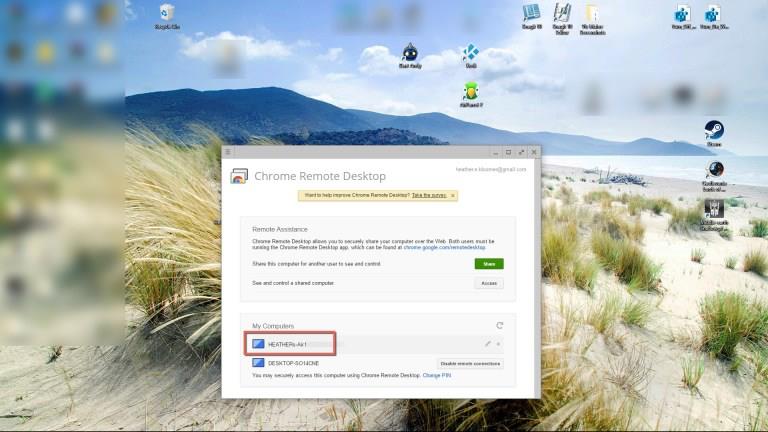
Then you will have to install the Chrome Remote Desktop on the Windows PC.
Step 1: The first step is to open the browser and open Chrome with the same if you used it before. Then set up the Chrome Remote Desktop as before.
Step 2: Then look for your Mac on my computer and you will have to establish a connection by entering the same pin.
 Once you have both of the laptops with the Chrome browser you will need some time in order to use iMessage on the Windows PC. There are a few simple steps that need to be followed.
Step 1: The first step is to enable iMessage on your Mac. You can do it by simply logging in with the help of your Apple ID and password. If you have not set up iMessages earlier, you can easily find the app in the finder.
 Step 2: The second step is to open the Chrome web store in the Google Chrome browser and search for the Chrome Remote Desktop application. You will have to download this on both Mac and Windows PC.
 Step 3: The next step is to set up the Chrome Remote Desktop application on both Mac and Windows PC. You will need some information and google credentials in order to successfully set up the application. Once you have successfully set up the application, you will be able to see the Mac from the Windows and vice-versa. If this happens, it means that the initial set-up is complete. Now you are very close to using iMessage on your Windows PC.
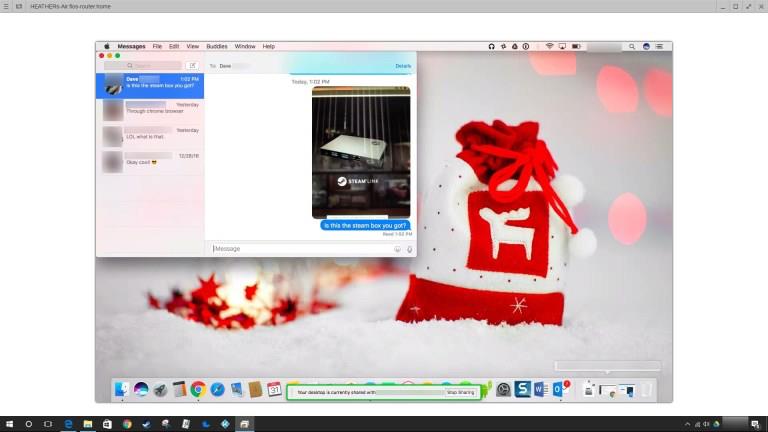
 Step 4: once you have launched the application on your Windows PC, you will select the name of the Mac computer from the list in the Chrome Remote Desktop application.
Step 5: Once you have completed step 4, you will be able to see the Windows screen on your Mac. Now you can use iMessages from the Windows PC. But you will still need the Google Chrome browser and the Chrome Remote Desktop application in order to maintain a connection. You will also need both the laptops to be close to each other.
 3) MAC Screen Sharing
The MAC screen sharing allows sharing the MACs screen with the Windows PC. This enables to use of iMessage on Windows PC. This method is not a very efficient one as it requires both MAC and Windows PC to work. However, here are some steps to accomplish the process.
Step 1: The first step is to open the Sharing in the preference panel.
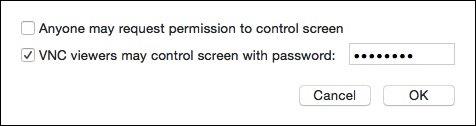
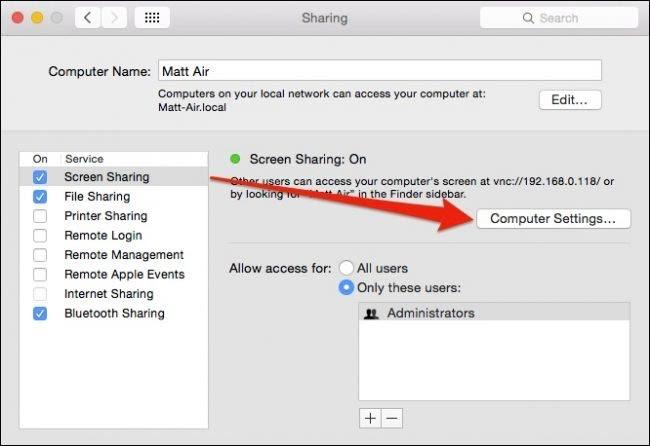 Step 2: Then you will have to click the computer settings. Also, make sure VNC viewers may control screen with passwords. Then you will have to select an easy password.
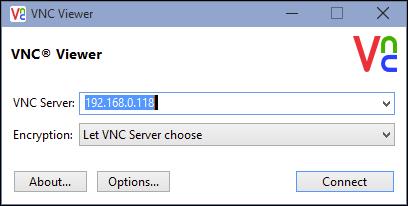 Step 3: Then you will have to enter the encryption for the VNC viewer.
Step 4: Then you will return to the connection and click the connect button. Then an authentication box will appear on the screen. You will have to enter the password in it.
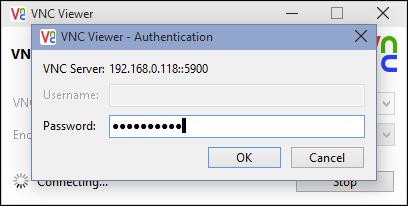 This is how you can connect with a Windows PC. You will have to connect from the Windows PC with the help of the password you established. This will allow screen sharing between the two computers. With the screen sharing, you can use iMessage on your Windows PC. However, this method is not very efficient as it requires you to have both Mac and Windows PC.
4) Jail Breaking
Jailbreaking allows accessing more flexible features on your phone and with its help, you can also access iMessages on Windows PC. It basically replaces the iOS of your phone with a more flexible operating system that allows many features to be accessed.
Jailbreaking is not recommended but if done it can help to unlock many features that might not be available without it. It helps to customize the apps and features of the phone. It also allows accessing iMessages on your Windows PC. It is not a very difficult task to jailbreak and here are some steps that need to be followed.
Step 1: Before starting the process you will need to back up your device and you will also have to restore your device with iTunes. Doing so will help to get better results from jailbreak.
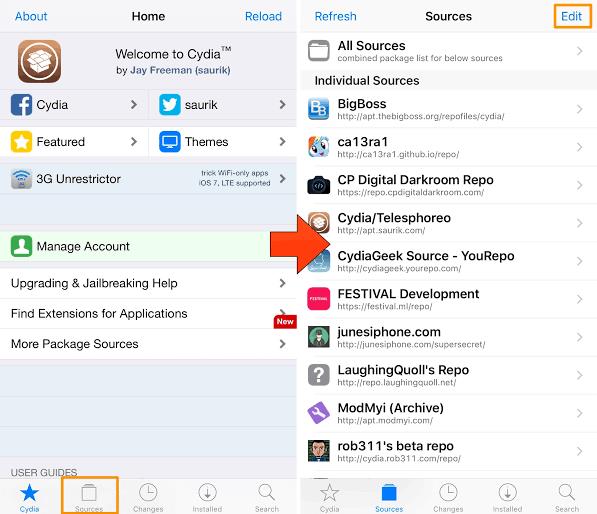
Step 2: The second step is to download the jailbreak app also known as Cydia on your Mac. Once the app has been downloaded you will have to follow the steps it will tell.
Step 3: once you find Cydia on your device, this indicated that you have the jailbroken App Store.
 Step 4: The next step is to download an application called ‘Remote Messages’. This application will help to access iMessages on any device you want. It can be a Windows PC or any other android device. However, you will have to enter the important credentials in order to have full access to iMessages on your Windows PC.
5) iMYFONE D-Port
To use iMYFONE D-Port is a very good alternative for individuals to use iMessage on Windows PC. This method is very handy and comes with many features that include its compatibility with the latest iPhone models. It is also available for both Mac and PC. With its help, iMessages can also be accessed on the Windows PC.
Setting up iMYFONE D-Port is not a difficult task and can be easily done with the following steps.
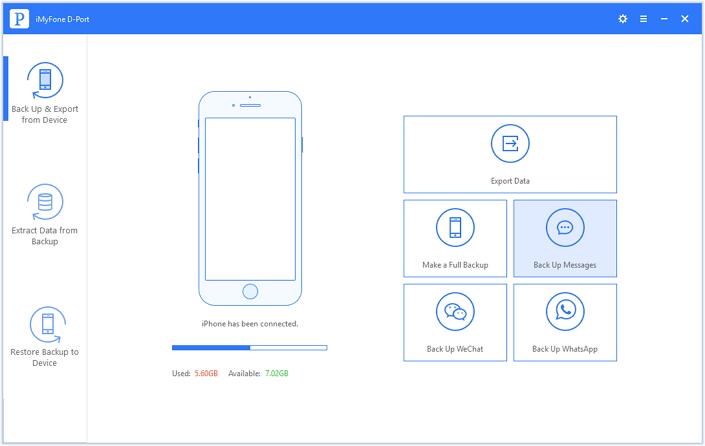
Step 1: The first step is to download, install, and launch the application on your PC. You can easily find the iMYFONE D-Port on the browser. Make sure to keep your phone connected to the PC with the help of a lightning cable.
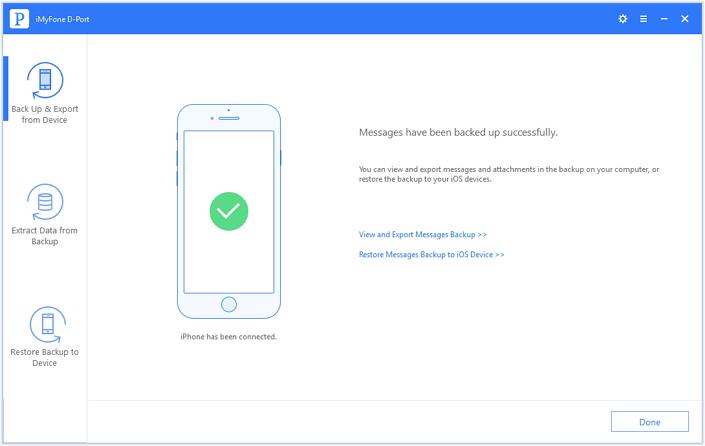
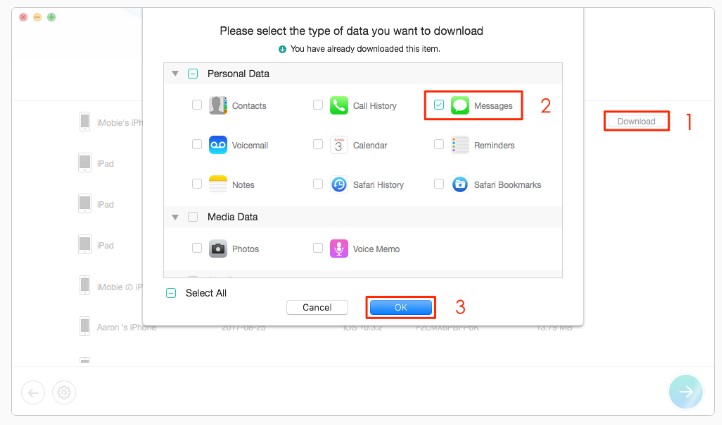
Step 2: Once the download has been completed, on the top left panel click on ‘Back-up and export from device’. After that select back-up from messages in the main menu.
 Step 3: The next step is to click the back-up button. Make sure you do not remove your device after this as it can result in the loss of data. You will be done with half of the process once the data has been successfully backed-up.
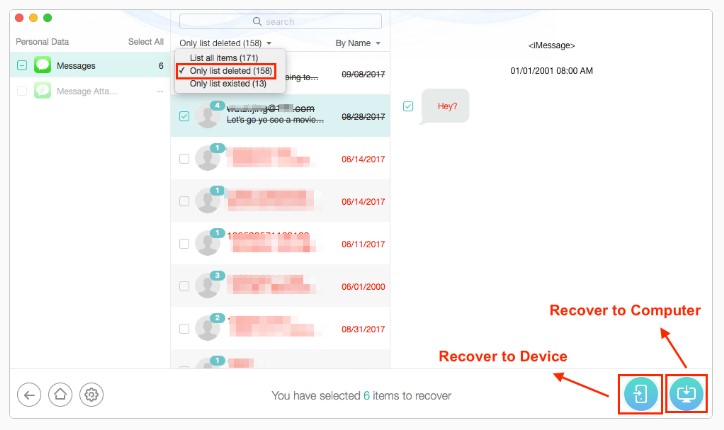
 Step 4: Once the back-up is complete, click on ‘view and export messages back-up’ in order to view and extract the messages. This is how you can use iMessage on your Windows PC with the help of iMYFONE D-Port. Another great advantage of using it is that you don’t have to be connected to the internet in order to view the messages.
 6) Phone Rescue
This method is compatible with both Mac Book and Windows PC. In order to access with the help of iCloud, you will have to use a tool called Phone rescue. This app is basically used when your phone is not working and you need to access your messages online.
The phone Rescue tool helps you to access your data online and to recover it with the help of iTunes or icloud backup. This method is very beneficial as it allows you to access unlimited data. Moreover, you can also recover your data if you want. So there are easy steps that need to be followed in order to access your iMessage data online.
- The first step in this method is to download the Phone Rescue for IOS on your laptop. Whether Mac Book or your windows PC. After downloading the Phone Rescue you will have to install it.
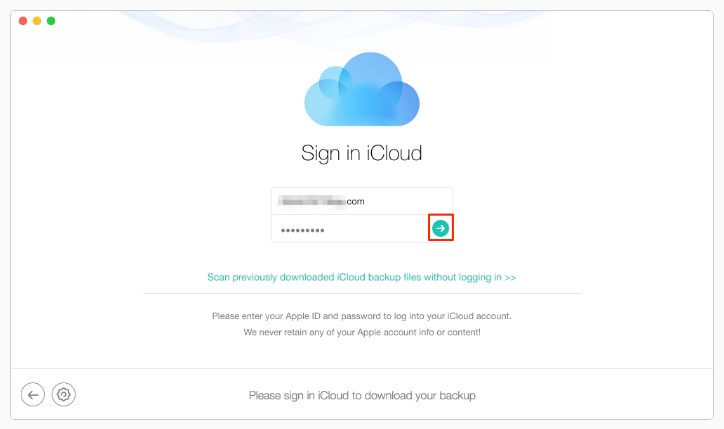
- The second step is to launch the software. Then you will be given the option to recover from iCloud. You will then have to enter your Apple ID and password in order to log in to your account.
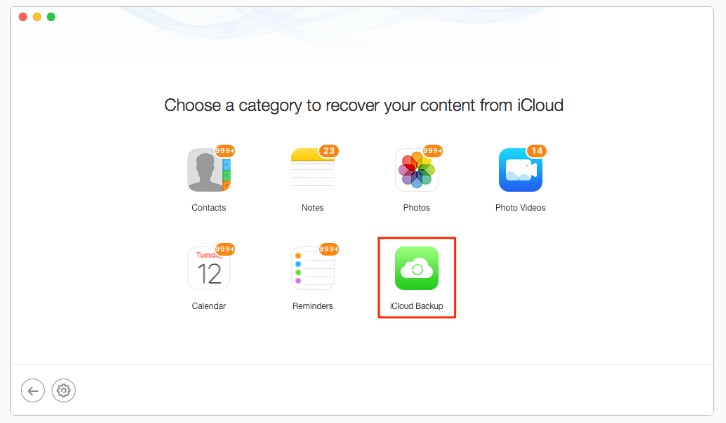
- Then you will have to select the iCloud backup. With this, you will be able to back-up your messages online.
- After the third step, the Phone Rescue will give a list of all the available backups. You just have to select the right backup. Then the option of the download will be given. Press the download button and your messages will be downloaded.
- Then you will be able to see your messages. You have now been able to access your messages online.
 This method is difficult than the first method. However, it allows you to access your messages online. One disadvantage of this method is that you cannot recover and see your messages if you don’t have an iCloud backup. Without the iCloud backup, this method would be of no use.
View Imessage Online Through Mac
The method is to see your iMessages online by login into your account on your Mac. One great disadvantage of this method is that you need to have a Mac Book to do so.
This can’t be done on a Windows PC. In case you do not have a Mac Book, this method would not be beneficial and you will not be able to access iMessage online. There are easy steps that can be followed.
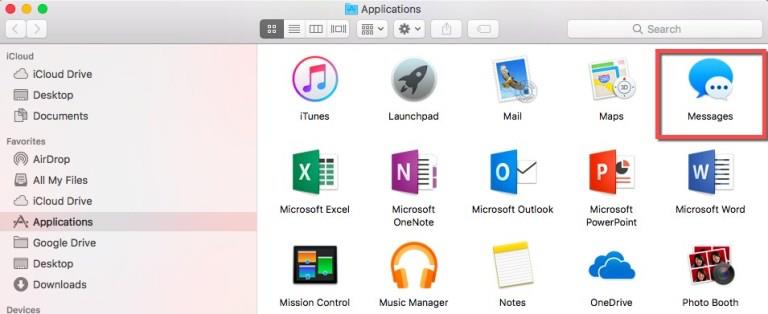
- First of all, you would have to go to the menu bar and select Messages.
- After selecting messages you will have to select preferences.
- The third step is to open the Accounts tab.
- Then a window will pop up on the screen and you will have to enter your Apple ID and password. This way you will log into your account and will be able to access your iMessages online.
This method is very convenient and you can access your messages fast. However, as mentioned before it is only useful for Mac book users and is not compatible with Windows PC.
How Access iMessage Online With Chromebook
To use a Chromebook to access iMessage online is a trickier method as compared to other existing methods. Moreover, this method requires you to have both Mac and Windows PC. This method might not be very attractive as if you have a Mac, why would you use iMessage on a Windows PC. However, there are a few steps that need to be followed in order to use iMessage on Windows PC with the help of Chromebook.
Step 1: The first step is to download the Chrome Remote Desktop application on both Mac and Windows PC. You can easily find this application with the help of any browser.
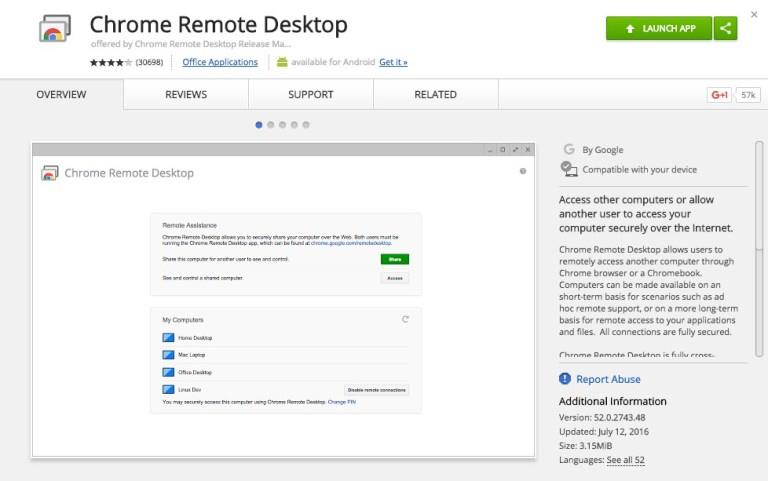
Step 2: The second step is to install and launch the application once the download has been successfully completed. Click on the Launch App button in an order to start the application. Make sure to follow this on both Mac and Windows PC.
Step 3: Then you will have to download the installer for ‘ Chrome Remote Desktop Host’ on your Mac Book. The installation process is quite long and it might be tiring but the steps to follow are quite easy.
Step 4: When the process has been successfully completed you will be able to enter the host code of the Mac computer on the Chrome Remote Desktop Host application. This will allow you to enter into the Mac computer. By doing so you will be able to establish a smooth connection between both laptops. This will also allow accessing iMessages on your Windows PC.
5 Alternatives To iMessages Online
There are many methods that can be used to send messages online and offline. iMessage is just a message application that can be used by Apple users. As we have already seen that it can be very difficult to access iMessage online if you are not an Apple user. There are many other alternatives to iMessage online that can be used effectively to send and receive messages. Here are some of the alternatives:
1) Whatsapp
 Whatsapp is the most common and effective alternative to iMessage online. It is also very famous and many individuals consider it to be better than iMessage.
The WhatsApp account is connected to your phone number and can be accessed with the help of your phone number. This application can also be used on your Mac Book and Windows PC which makes it hassle-free and quite convenient.
With WhatsApp you can share messages, voice messages, pictures, videos, GIFs and you can even video call. the best part of the application is that it can be used by both Apple and Android users. It is an amazing application and an alternative to iMessage online.
2) Snapchat
 Snapchat is a relatively new but very famous application. Snapchat had been primarily designed to send pictures and videos instead of messages.
However, it also has an option to send messages. This makes it very convenient for individuals to chat in any form they like. This application has gained a lot of popularity amongst the youngsters and it is very good to send messages.
Moreover, it has a feature to save messages. On this application the messages will only be saved if you want, if you don’t save the messages they will just vanish. The best part of the application is that it can be used by both android and Apple users.
3) Facebook Messenger
 In today’s world, there is rarely any individual who does not have a Facebook account. Facebook Messenger can only be used if you have a Facebook account. However, it is a very good application to send messages and voice messages.
This application also provides users with the option to call and video call. You can send messages to anyone, even those who are not on your friend list but the messages can only be sent to Facebook users.
This application does not allow you to send messages to non-Facebook users.
4) Kik messenger
 Kik messenger is also a messaging application that has gained a lot of popularity.
This application allows individuals to send messages online to any user. With the help of this application, you can send messages to Apple, Android, and Windows users.
They just need to have the Kik messenger application installed on their device.
5) Telegram ![]()
 Telegram is a very popular messaging application, especially on a larger scale. This application can be used by iOS, Android, and Windows users. It is compatible with all kinds of software.
The most interesting part of the telegram is that it has its own cloud storage. This means all the messages and files you share can be easily stored and accessed on it.
The message and media files can be accessed from anywhere around the world. The application also allows sending stickers and GIFs. The Telegram application also allows us to create groups of up to 5000 individuals and it also allows us to send files up to 1.5 GB.
You can also Read Trend Liff Other Guides Too!